Asset by asset remaster of Vampire the Masquerade: Bloodlines. Fully remodeled, retextured, and re-lit using Nvidia's RTX Remix tools.
Intro:
Hey everyone, or... anyone who reads this...
It's been a little bit, and I've been hammering away on replacing all the props in the SM_Pawnshop_1 Map. AKA: The first Haven in the game. I actually only have 3 or 4 more models in the actual apartment area before I'm done with that set, which is crazy considering how many there are!
It's been taking a bit because there are actually quite a few models in the VTM:B maps.
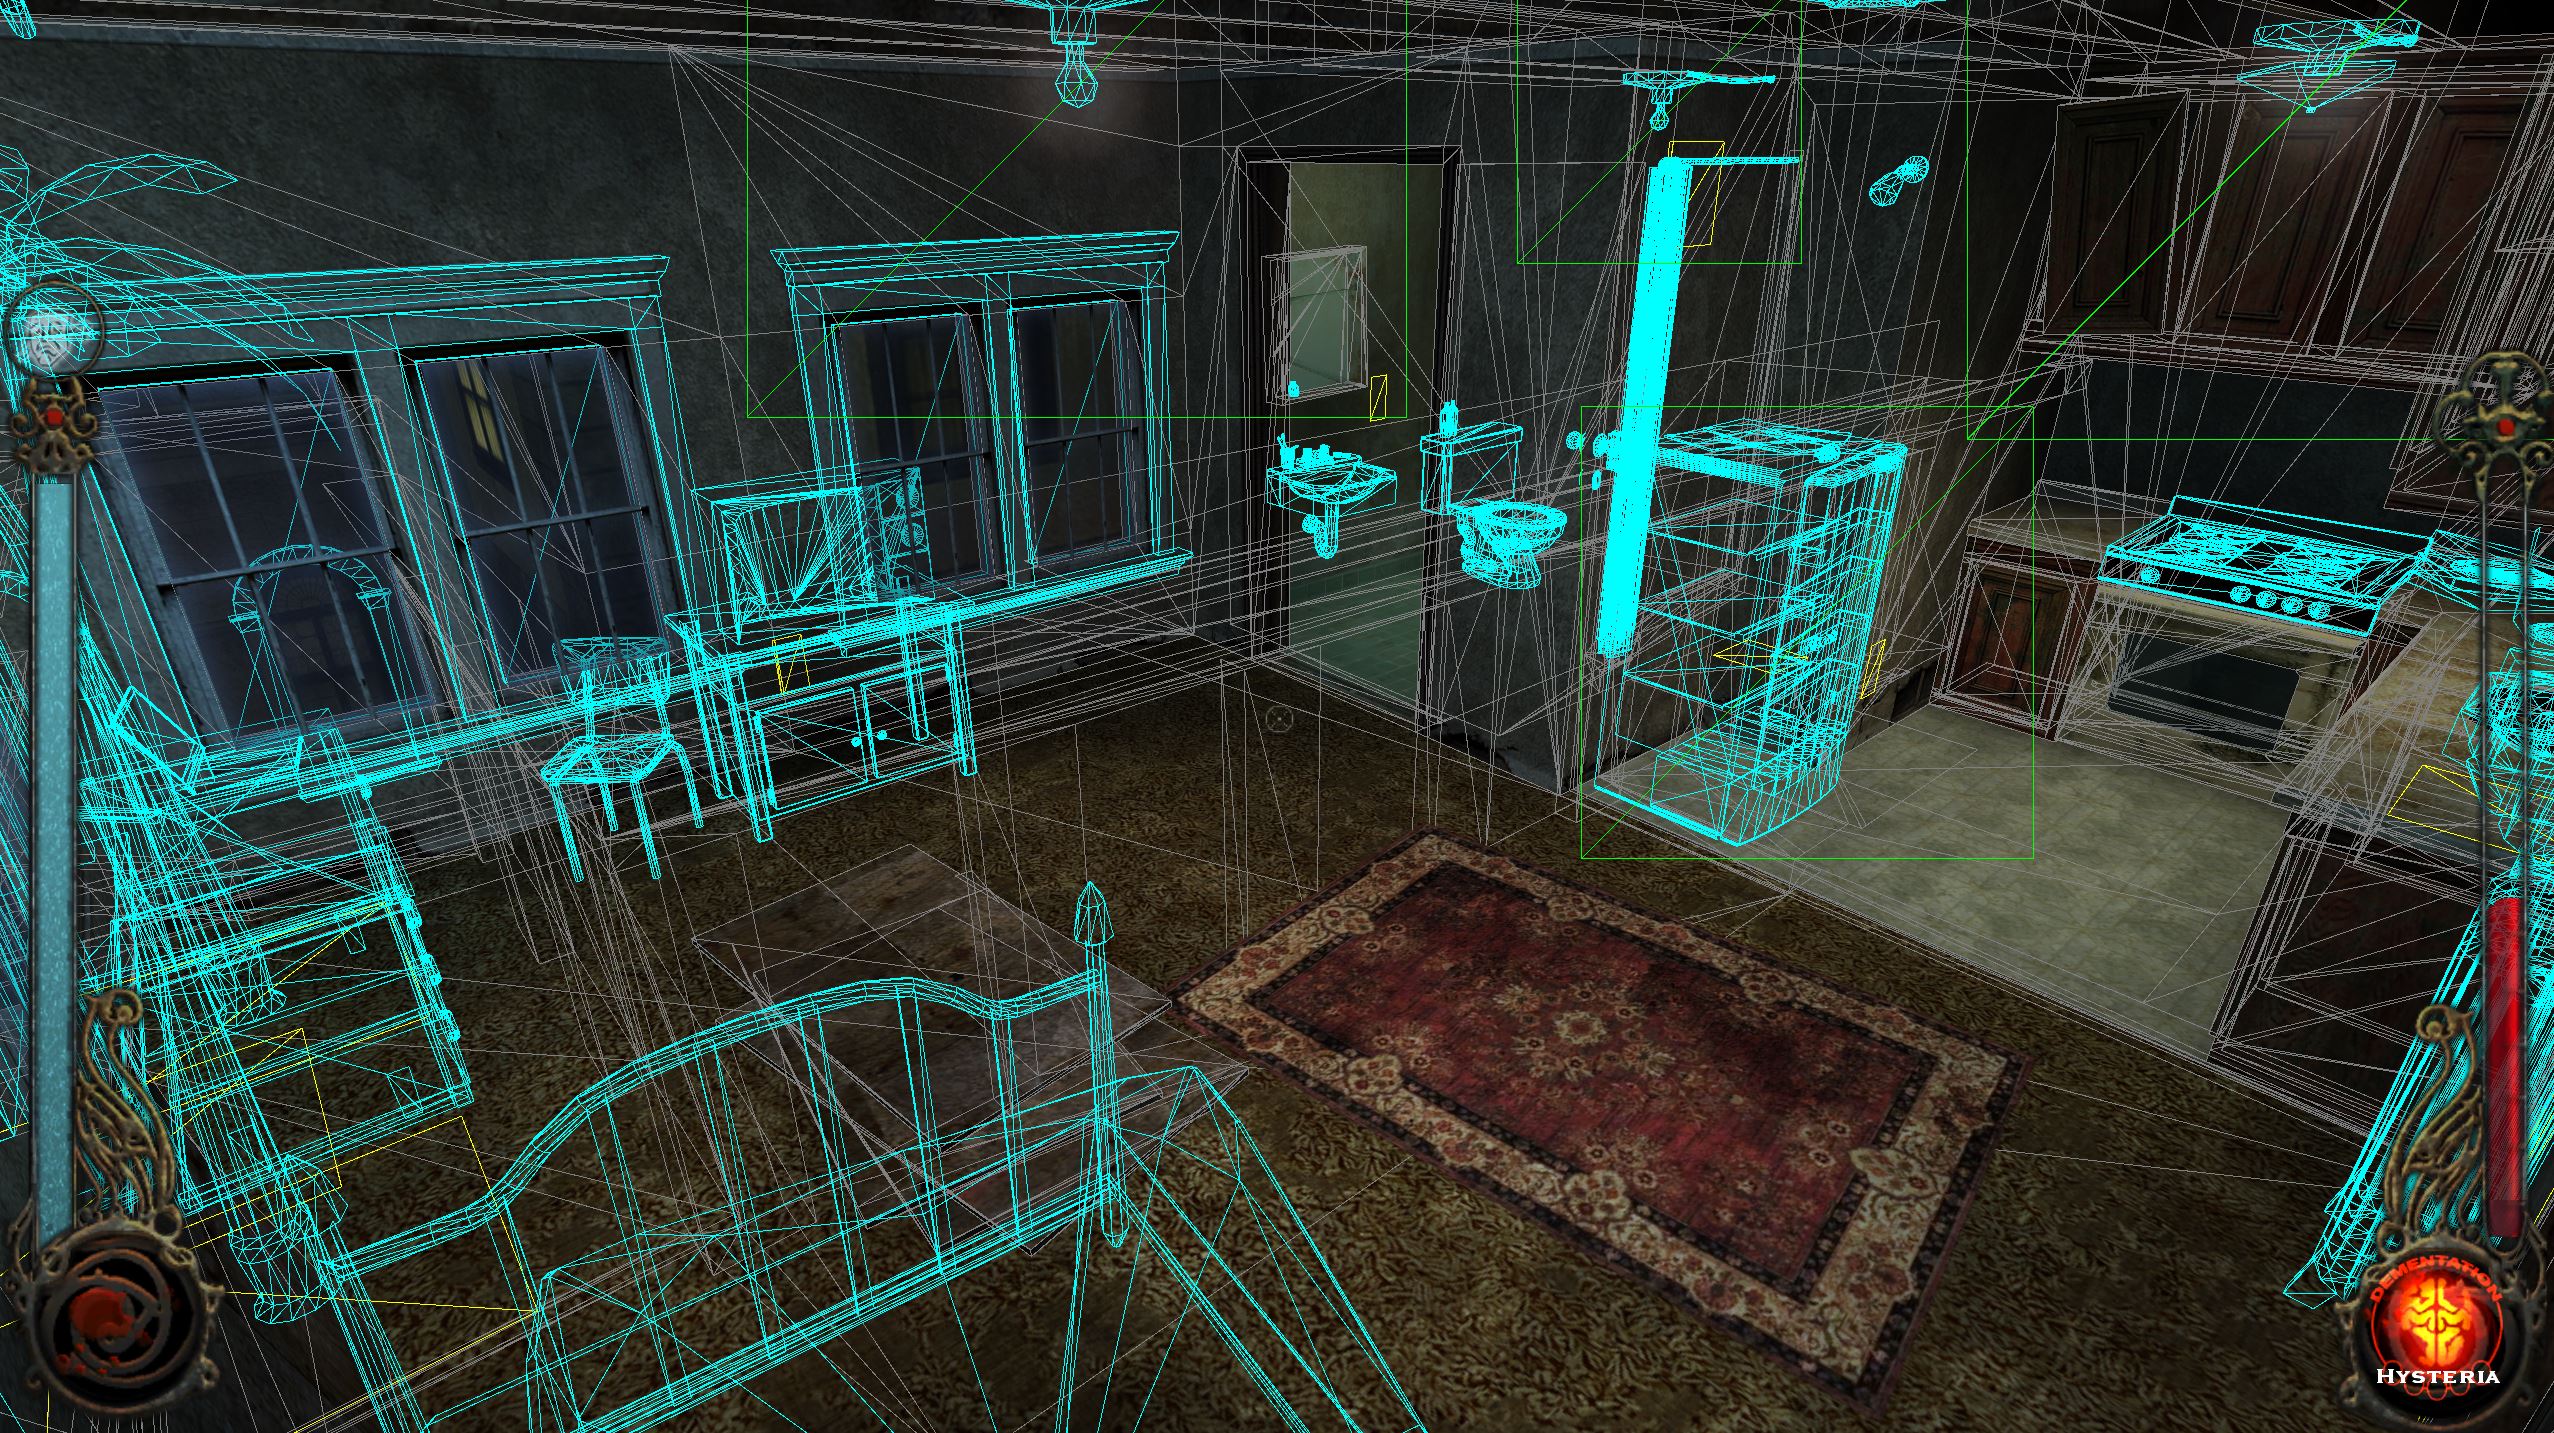
Blue wireframes are models.
Yellow Wireframes are decals.
Gray Wireframes are BSP brushes.
Green Wireframes are FX like light halos and particles.
Around this time the industry was transitioning away from building levels almost entirely using BSP brushes, and as a whole starting to incorporate actual models for things like level details and props.
This is great news for VTM:B because it means there are a lot of opportunities for full on replacements of objects in the world, not just retextures!
So I wanted to talk a little bit about how I am attacking that challenge today.
Firstly, when Remix captures, it grabs an object and assigns it an ID based on a number of factors. Most often an object is split into multiple ID's depending on how many materials it had on it, which can create some complications. But it also means that an object with that ID can have instances in many places throughout the game. The TV in that shot for instance appears in the haven, the bail bonds office, the hospital in LA, and many other places.
Setting up:
Blender has a USD importer and exporter build in, and it's free and open source, so you KNOW I'll be using the free thing...
Remix performs it's captures from the perspective of the game camera, meaning it culls objects based on the camera frustum. So you will need multiple captures to get everything you need.
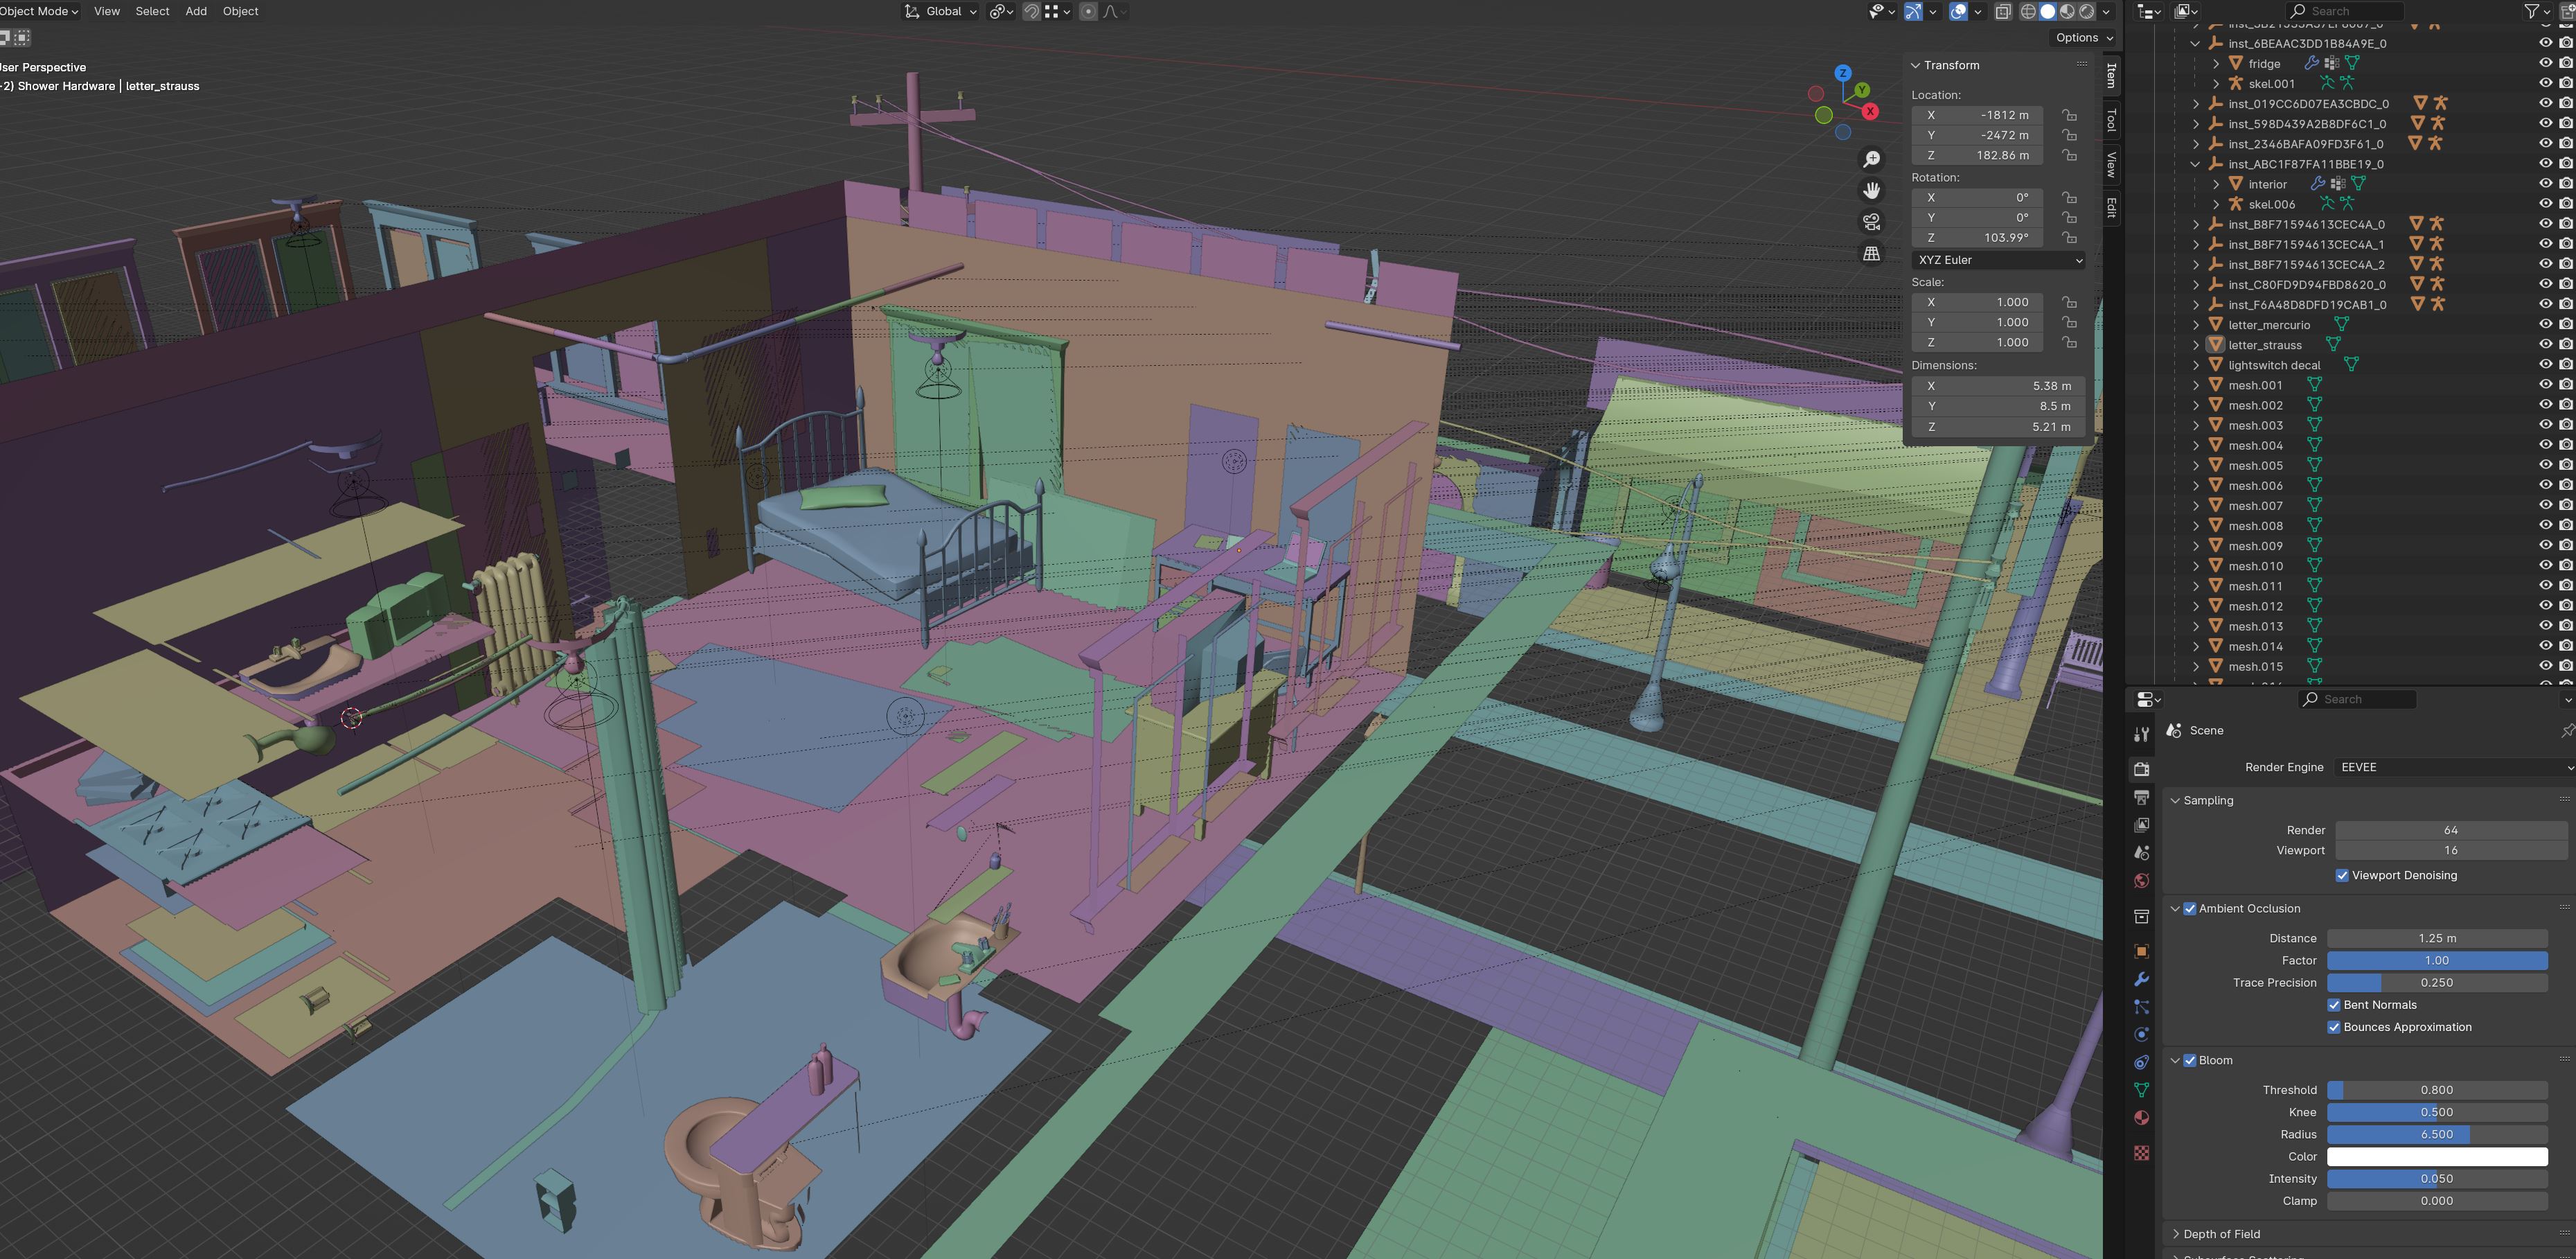
Here is a capture of one angle of the haven imported into Blender.
It's probably pretty obvious now just how many objects and instances of those objects are actually in a level. Like... a lot or whatever...
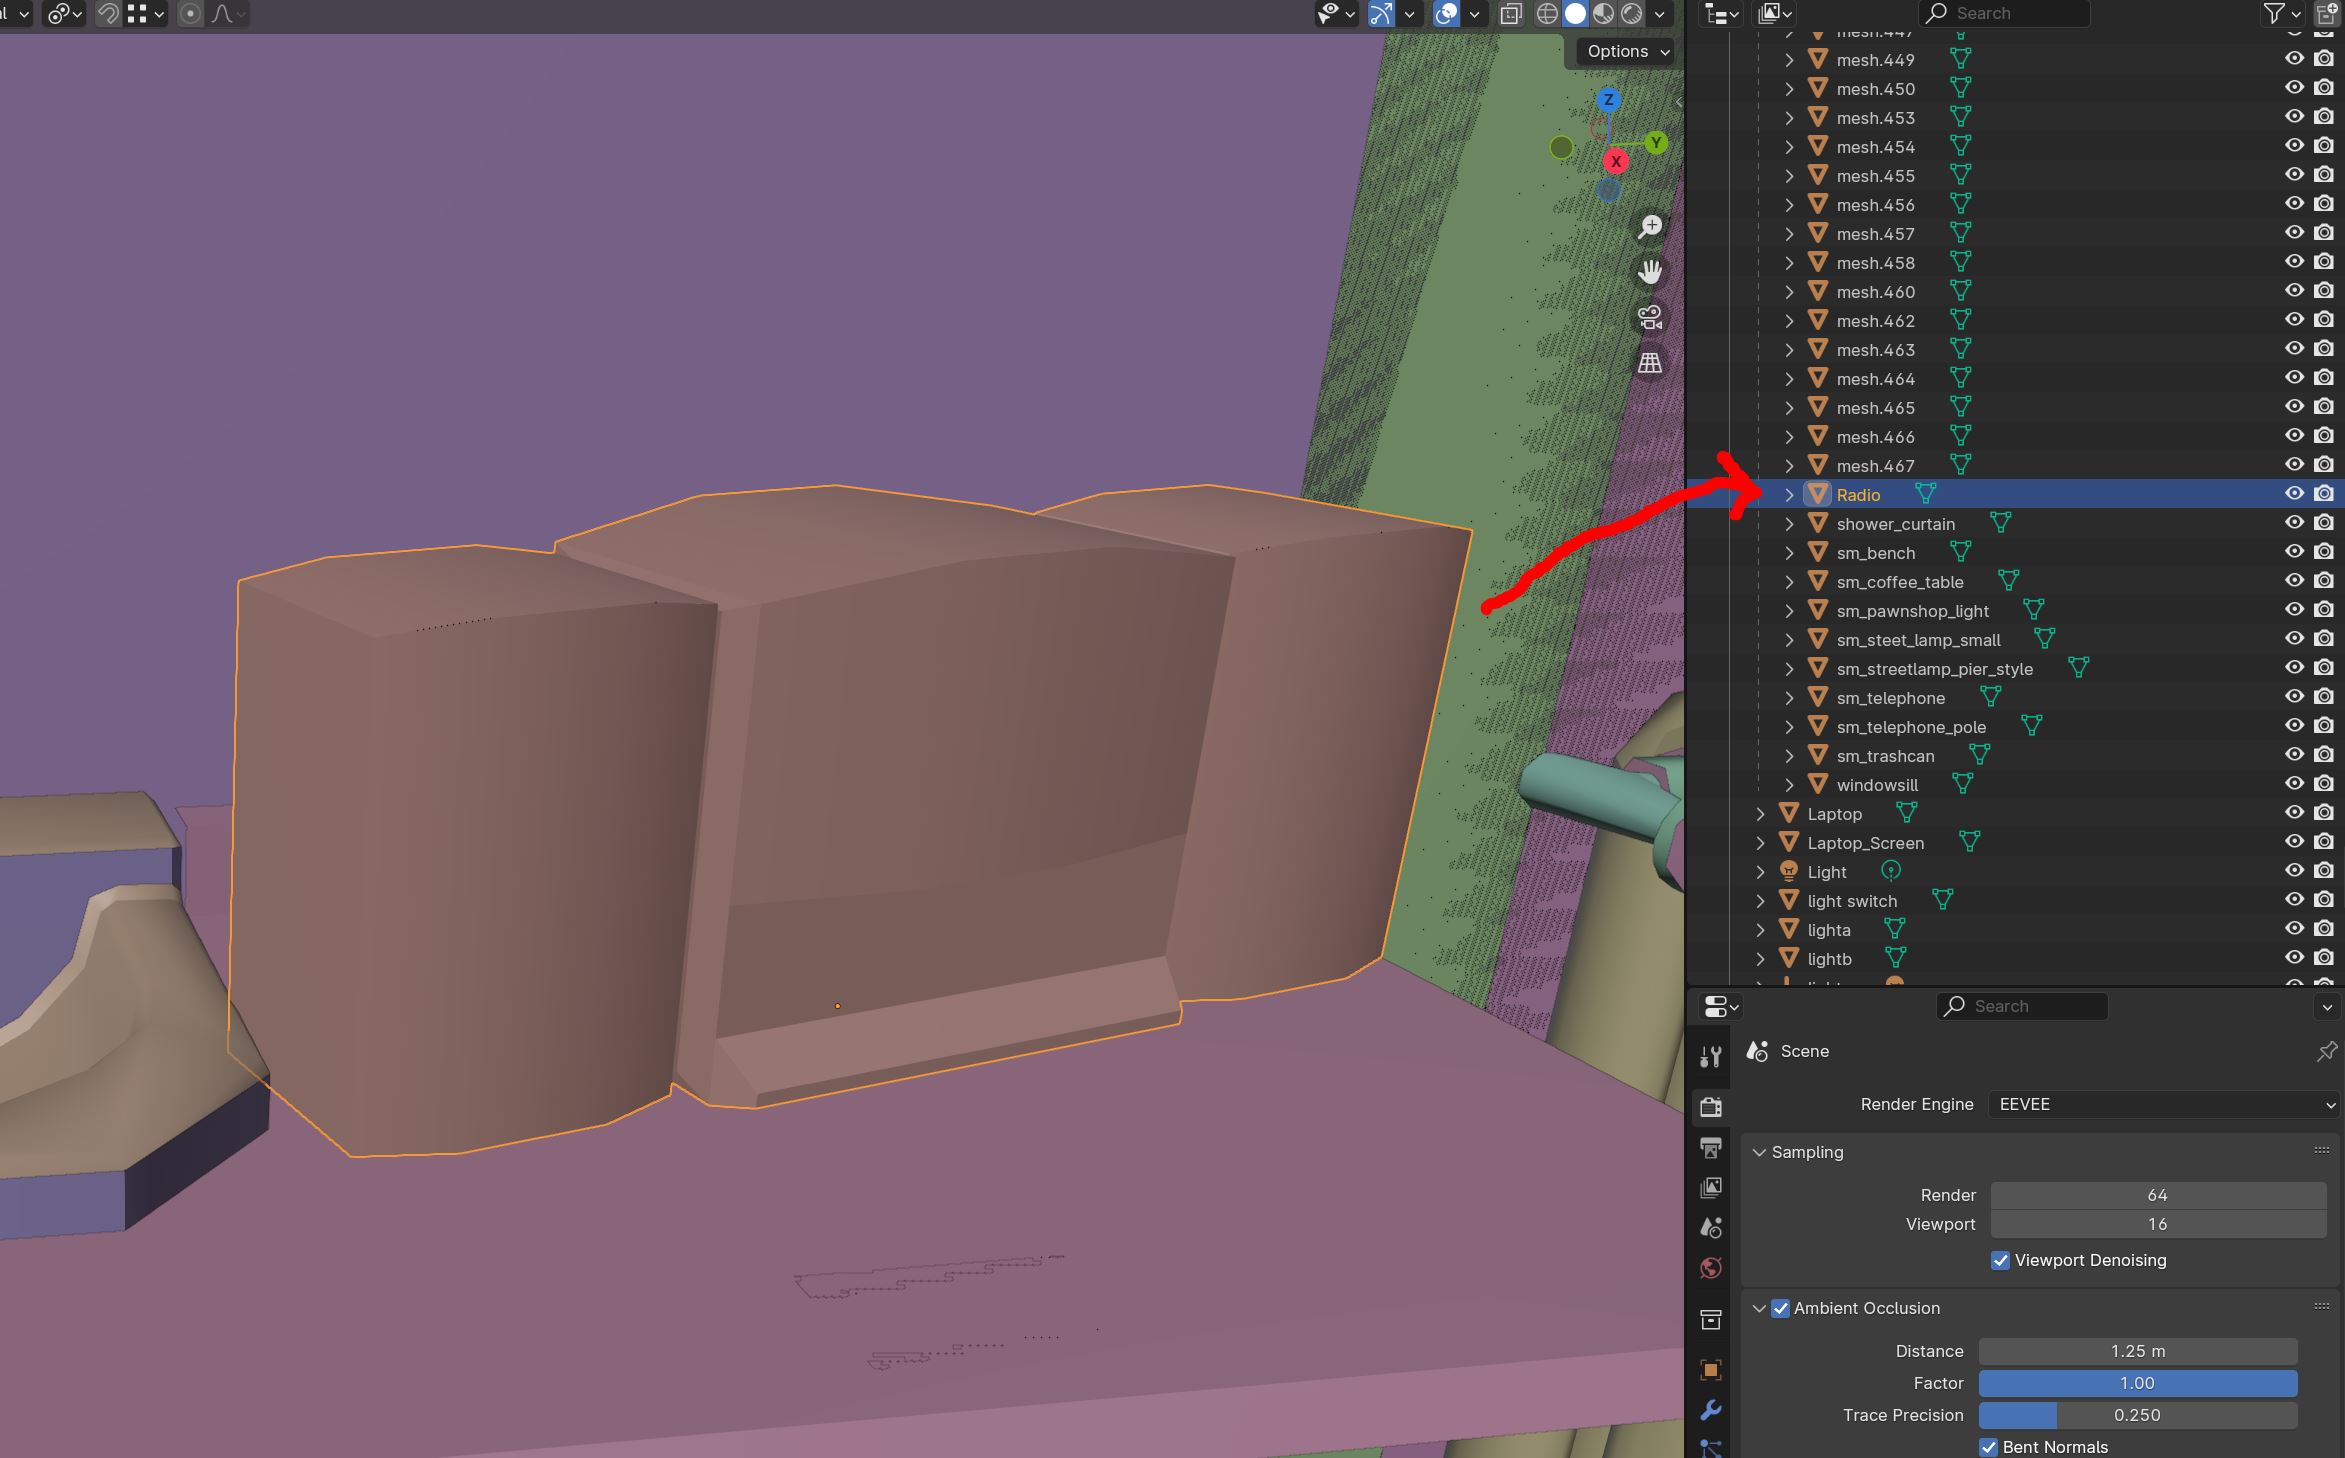
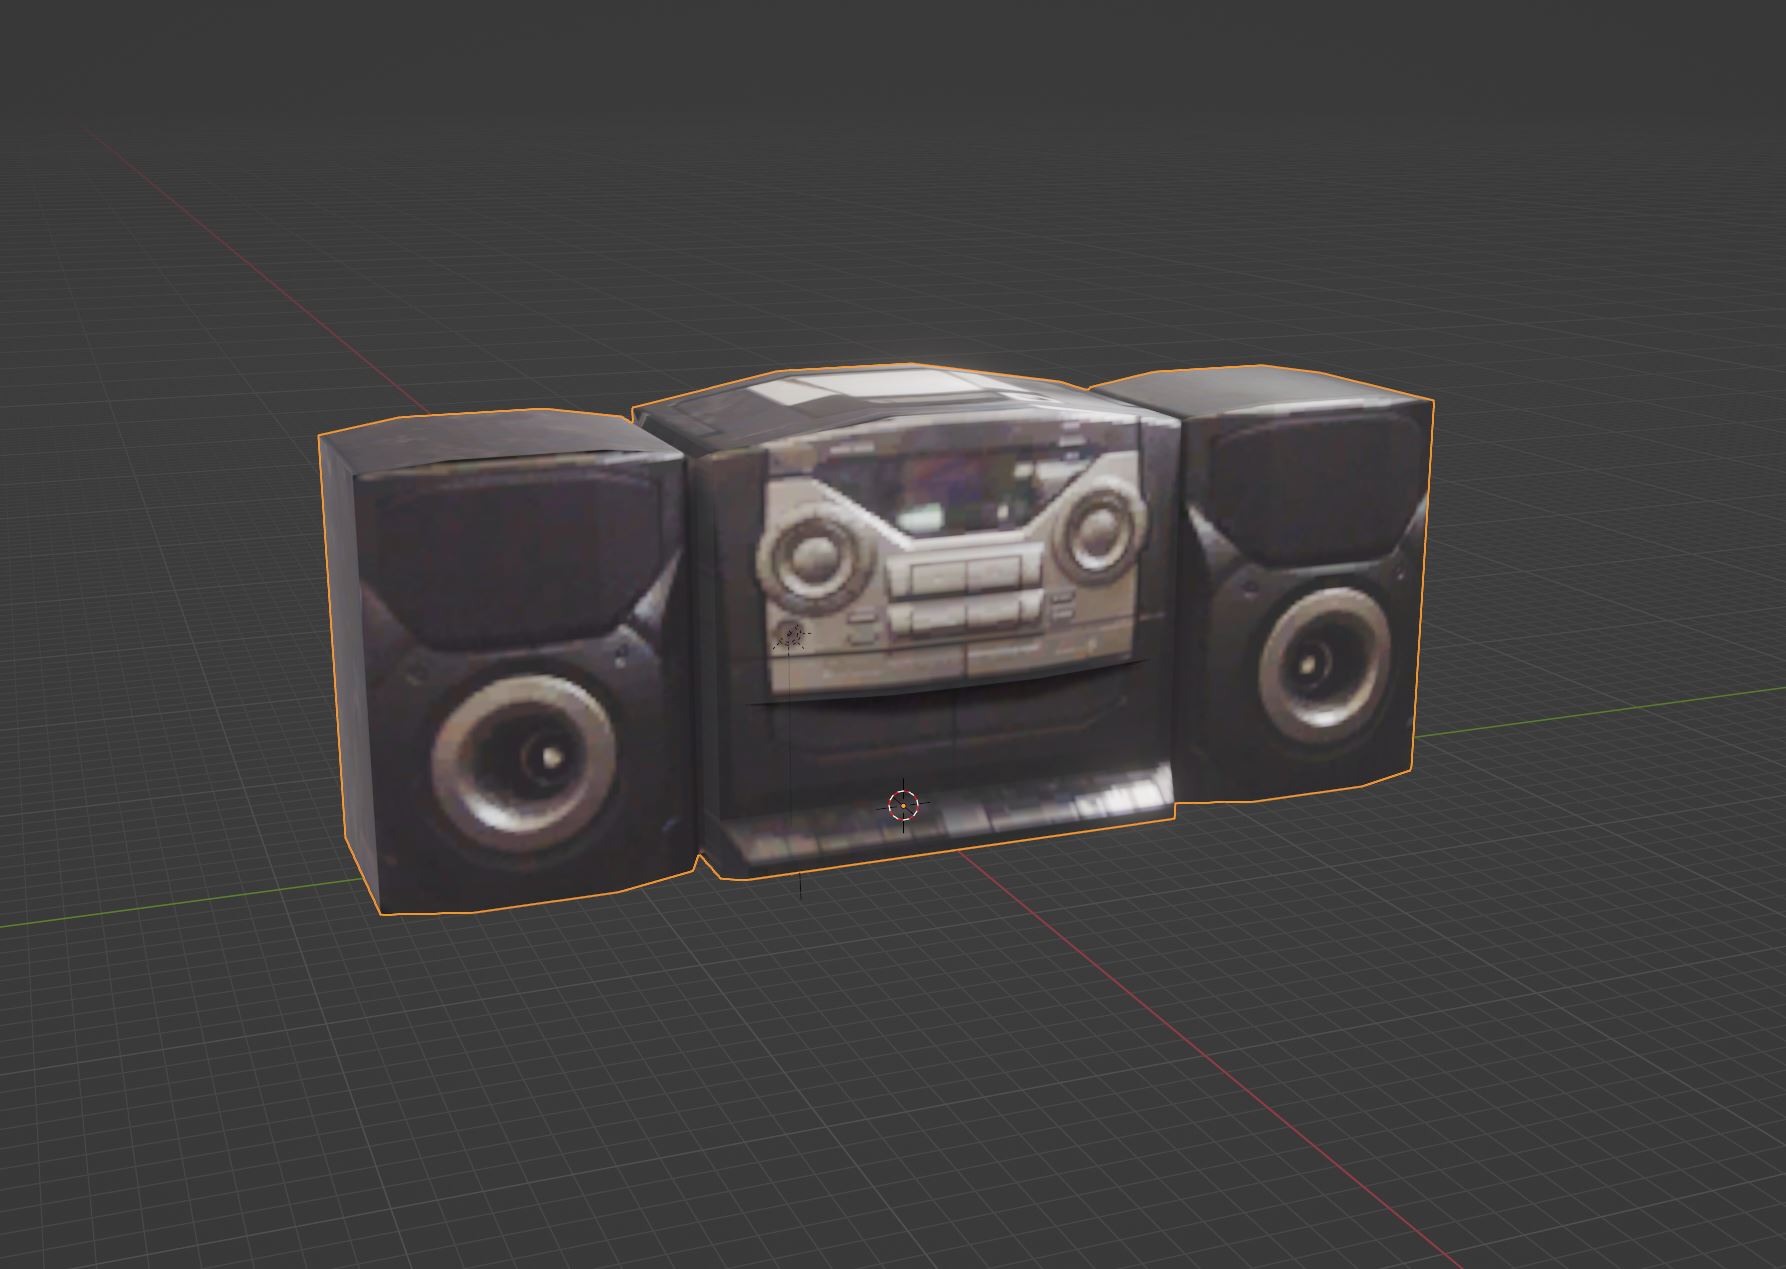
So I know I want to remaster something, in this case I want to remaster the Radio for example. So I can go ahead and save this as a blender file and start naming things in a more friendly way. I will not be using this file to re export anything, it's just to snag objects from.
After I isolate and rename this object, I just save and close. I'll be making a brand new Blender file to remodel this.
I then Append my radio from the other blender file into my brand new clean slate Blender file, and assign the old texture to it. I know have the exact size, proportions, and a great reference in general to build from.
Gathering Reference:
You'll notice this is made from photos of a real radio, I wanted better reference, so I took a screenshot and ran it through Google Image search and guess what!

While the images aren't great, there are a few floating around. It turns out our old radio is an old Memorex MP4321! After finding some more images and an old technical manual for the MP4321, I think I'm ready to start modeling.
Reference is such a massively important part of making assets, I can't state it enough. Do your research, and you will be able to build pretty much anything.
Hi-Poly
The workflow I favor is the Hi Poly to Low Poly bake method.
I model the high poly, I give it some albedo/diffuse colors so that I can bake those out as an ID map for procedural texturing later. This also gives me an idea of how well I'm hitting the target. This method let's me focus on form, and shape, and gives me the source I need for everything moving forward. It also makes iterating fast when I need to add details to the texture, I simply rebake!
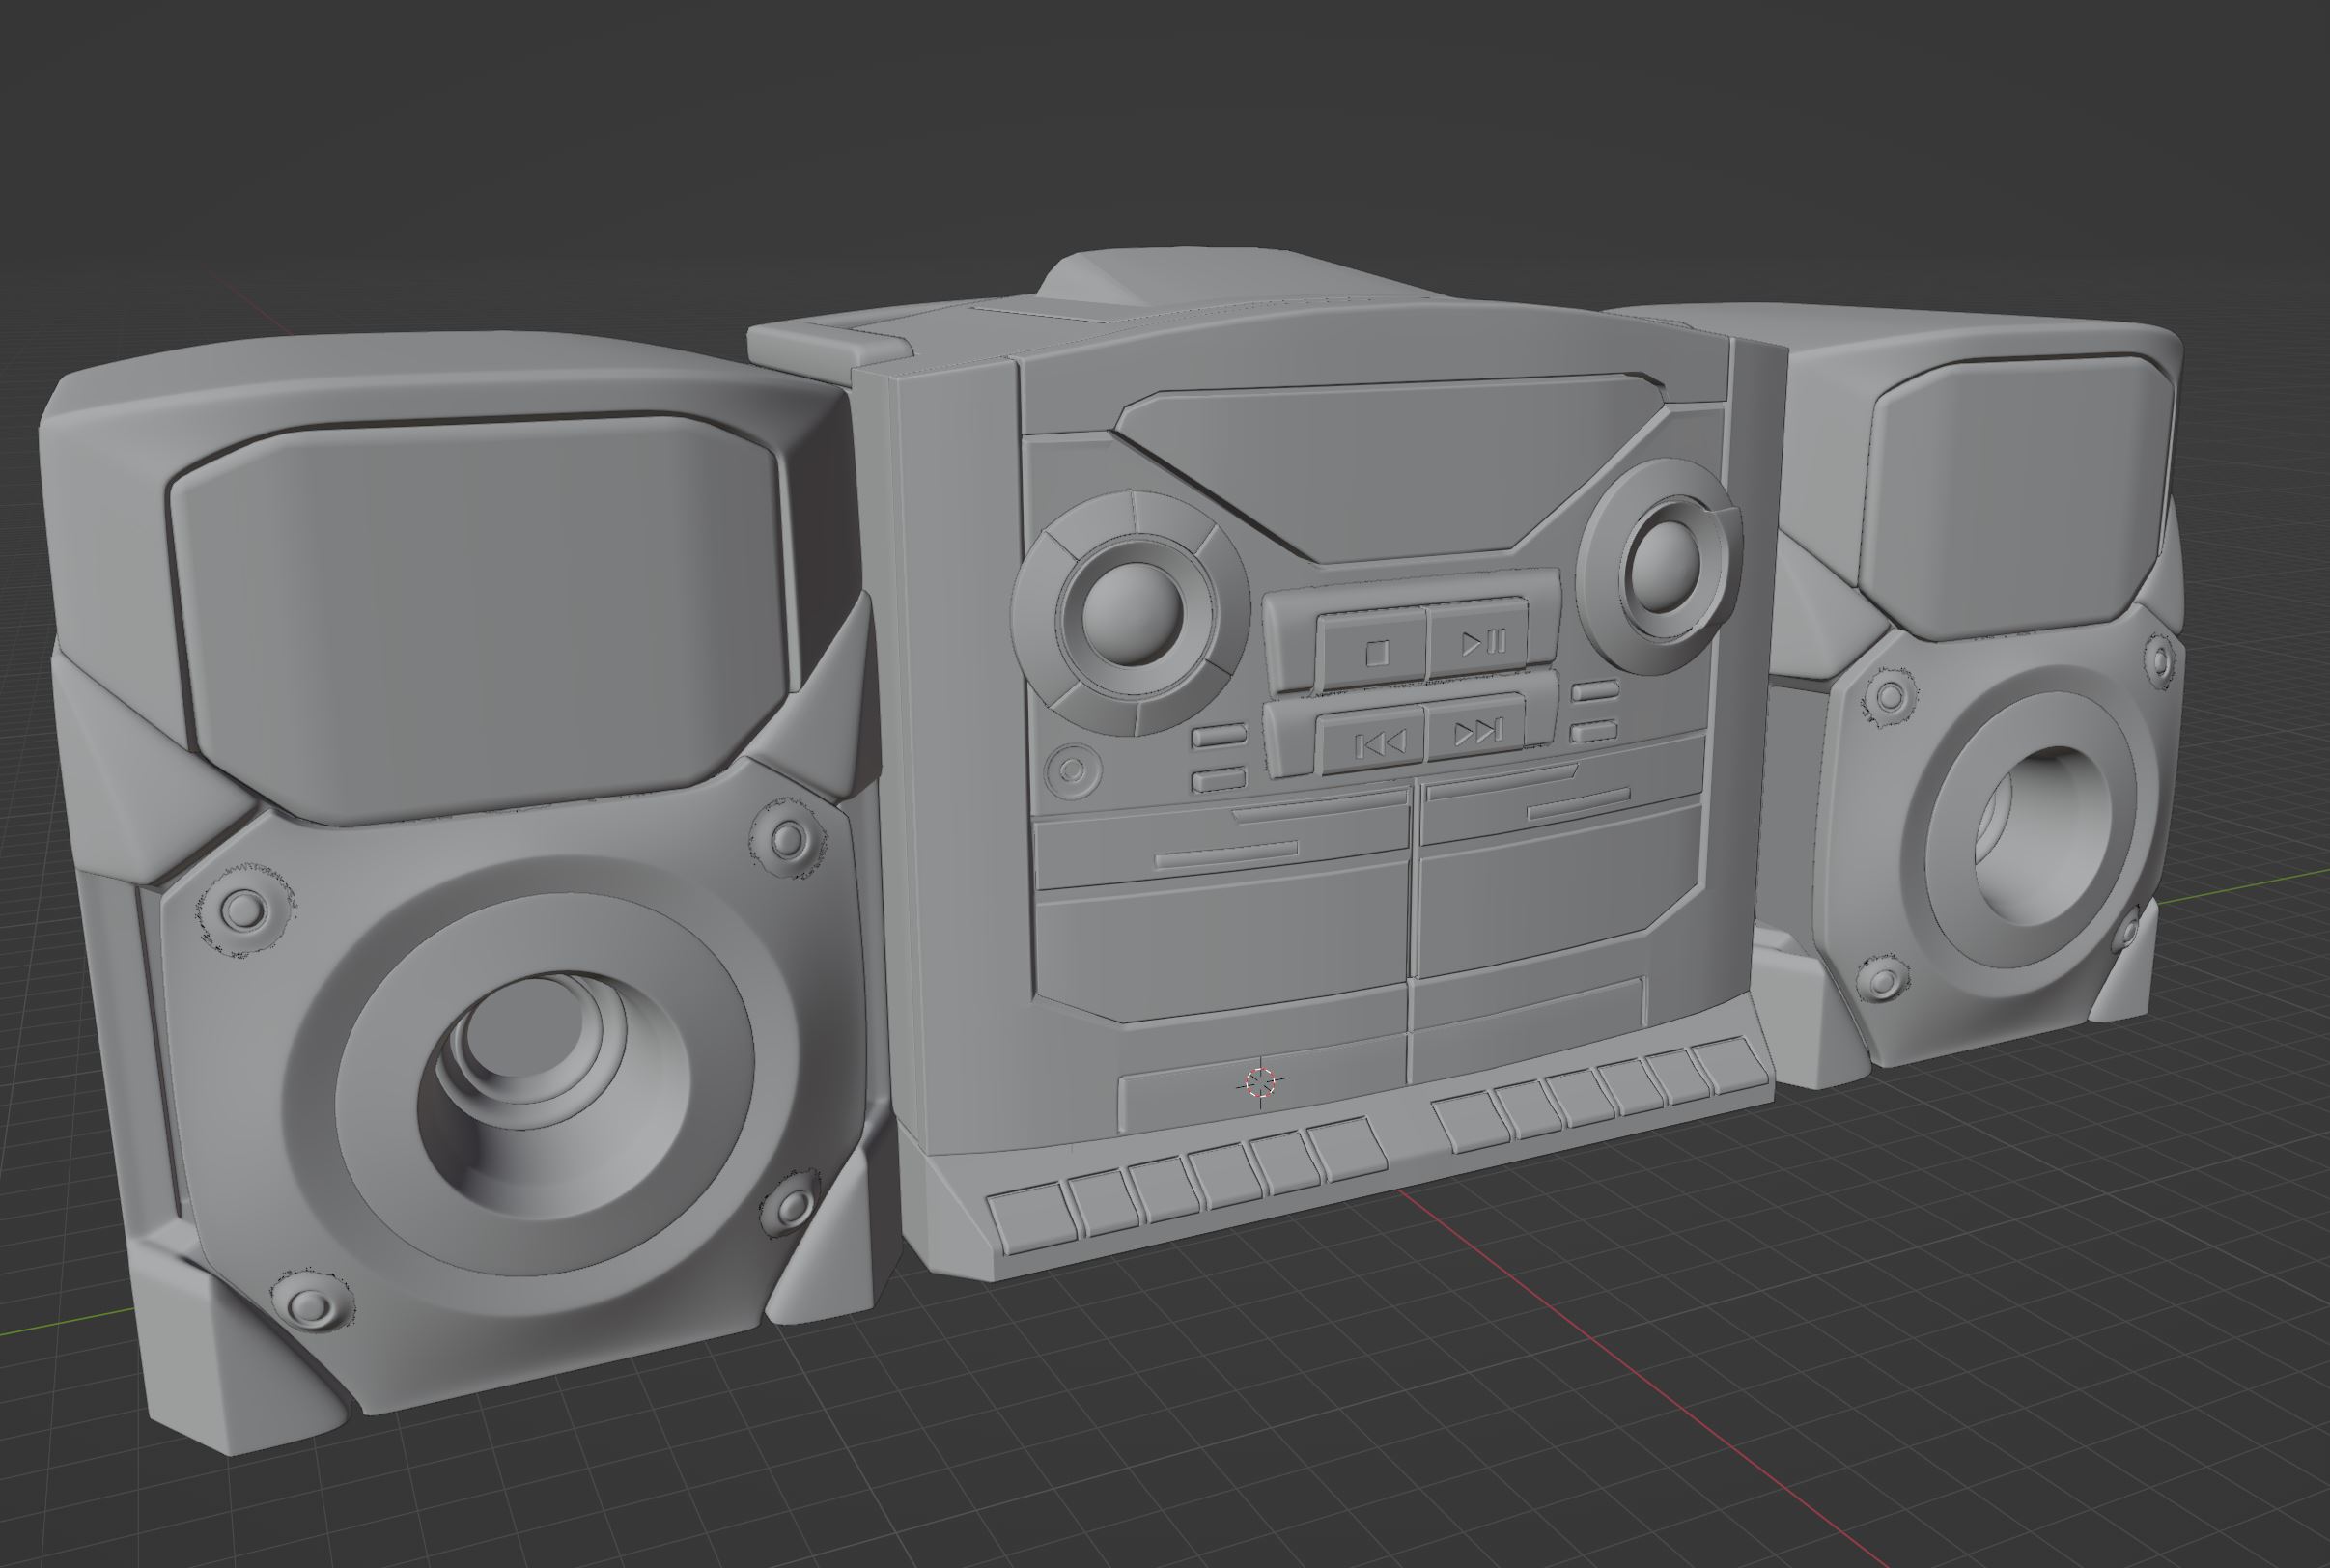
This may seem very much like a "Now draw the rest of the owl," tutorial, but remember, this is the high level process. Learning to model and texture is something you can do through some amazing tutorials on youtube, but it's out of the scope of this article.
The High Poly with simply materials applied for baking an ID map later.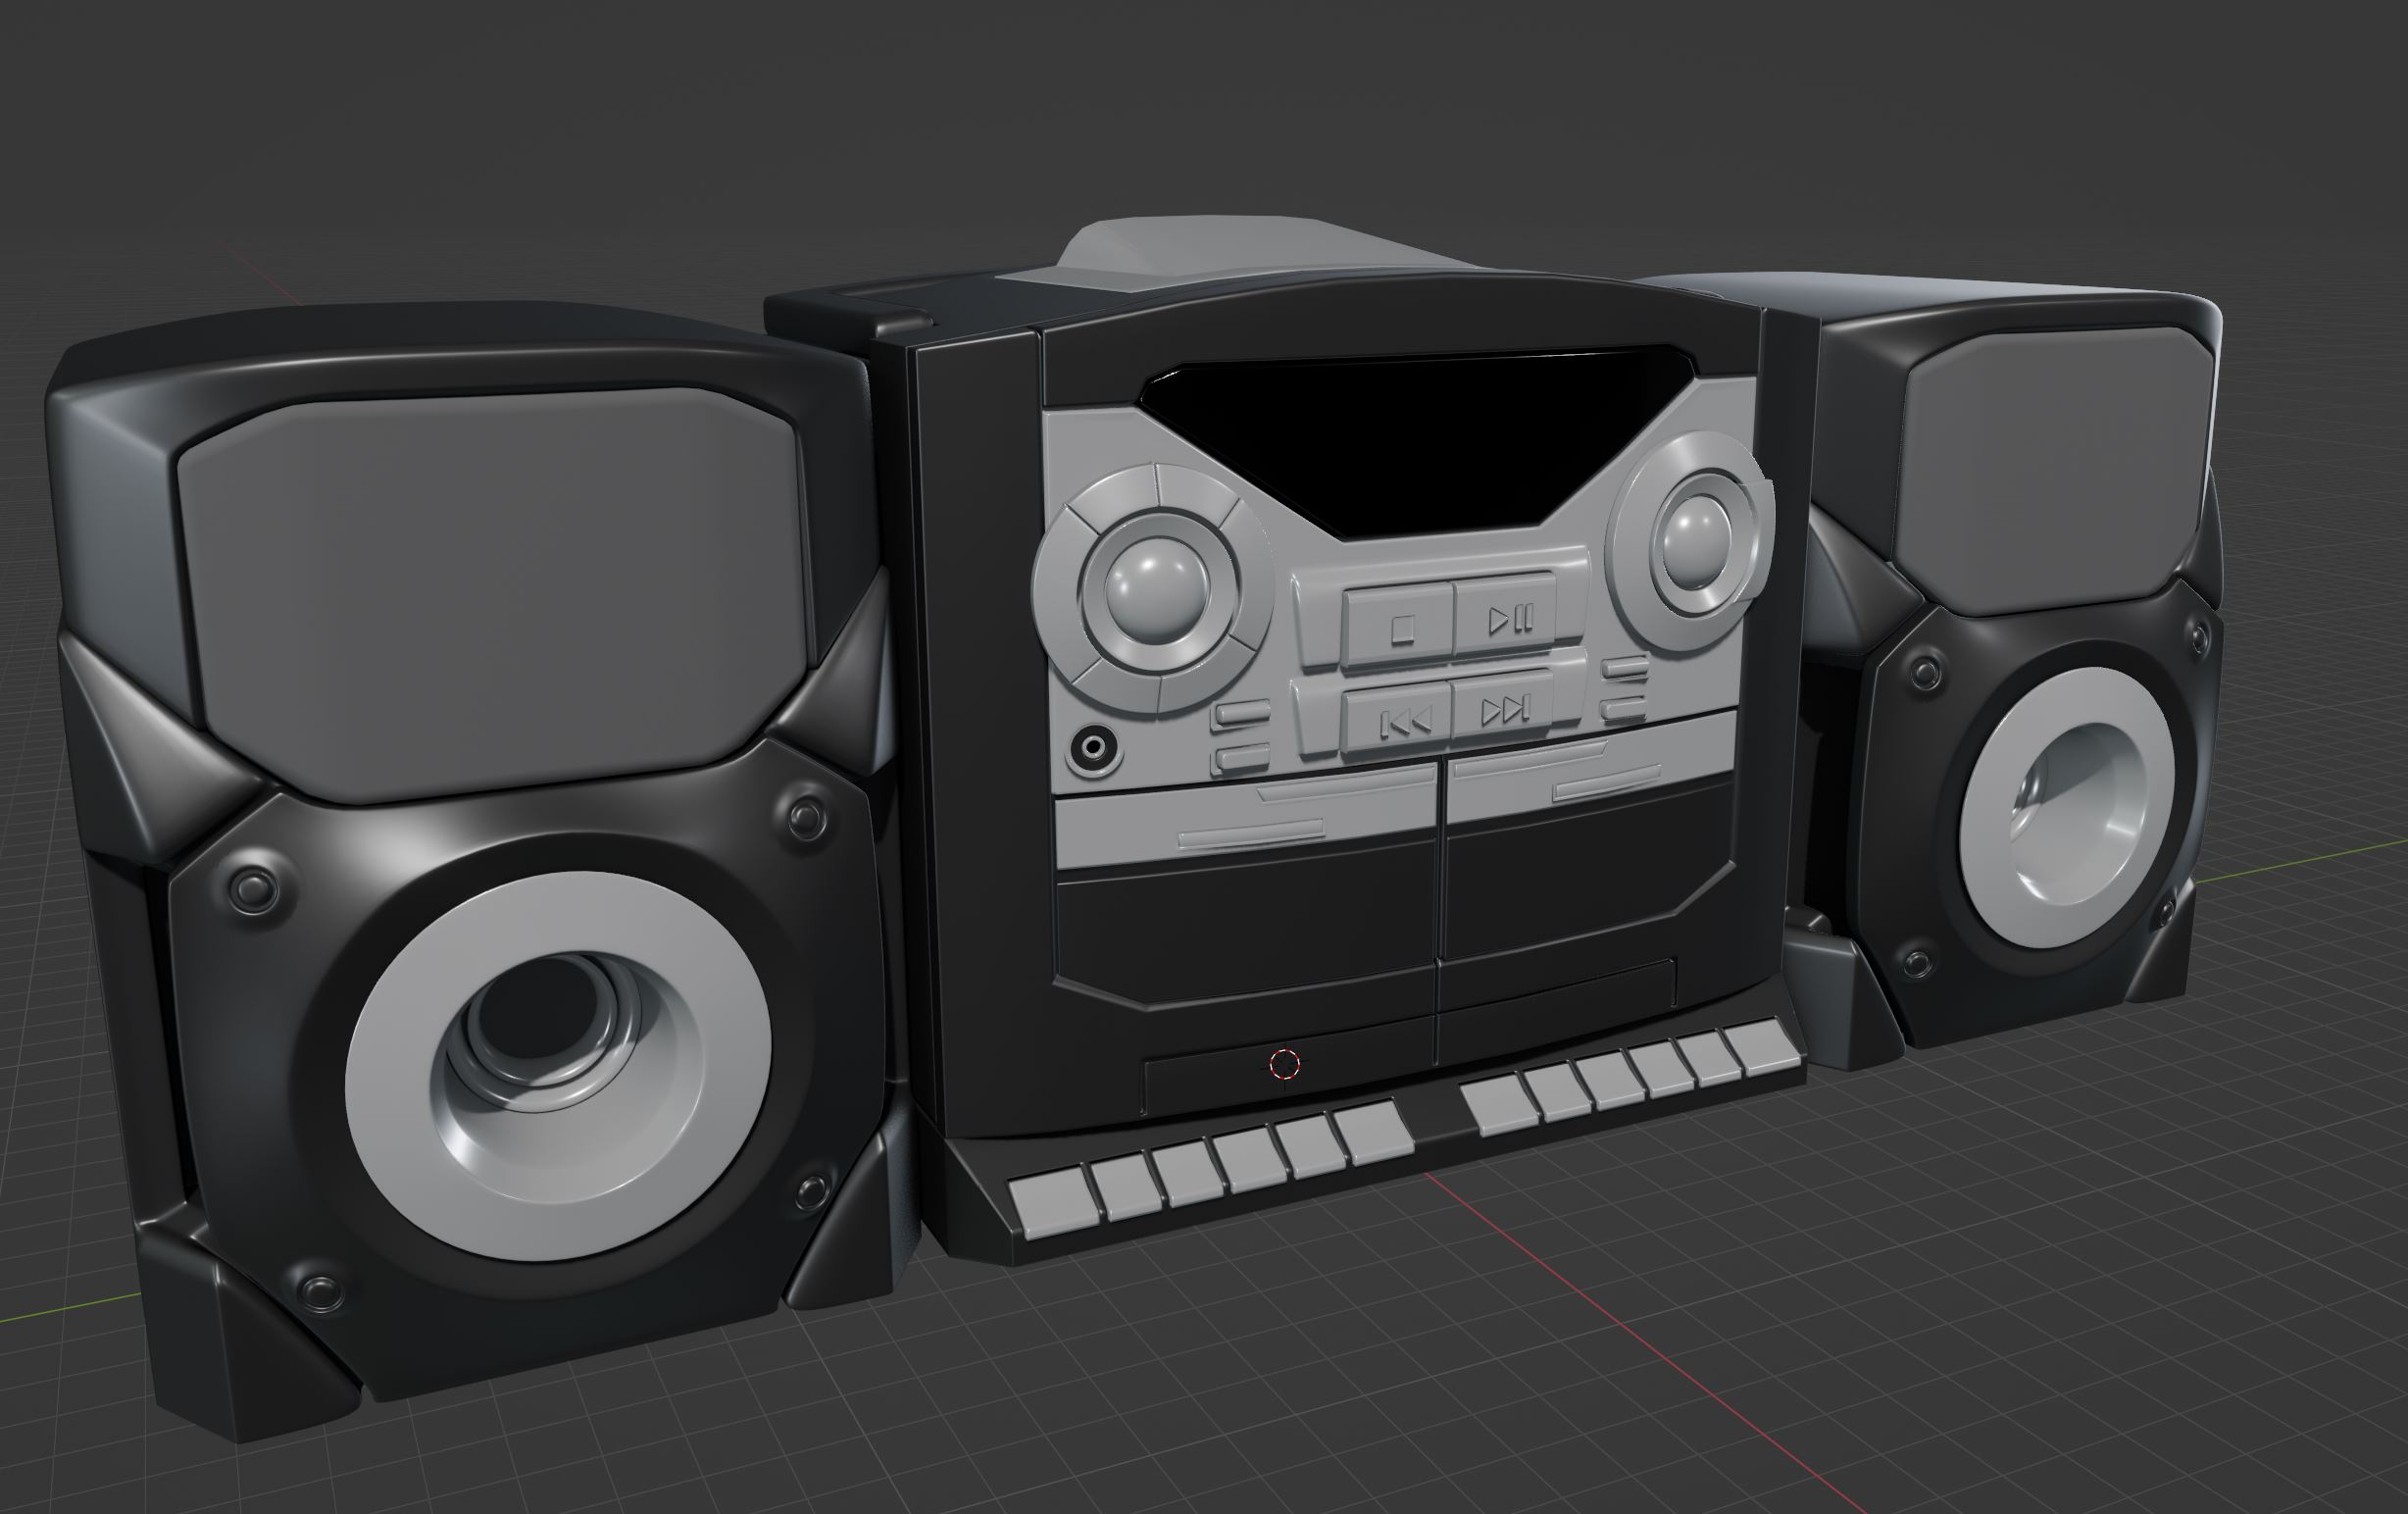
Notice that many of the details are actually floating. This is a technique used to cut down on complexity, those details will all bake down to the low poly anyway, so it's ok to use floating geo in many cases!
Low Poly:
Using the Hi Poly as a guide, I then model the low poly and unwrap it. This step can vary wildly in complexity depending on the object you are modeling.
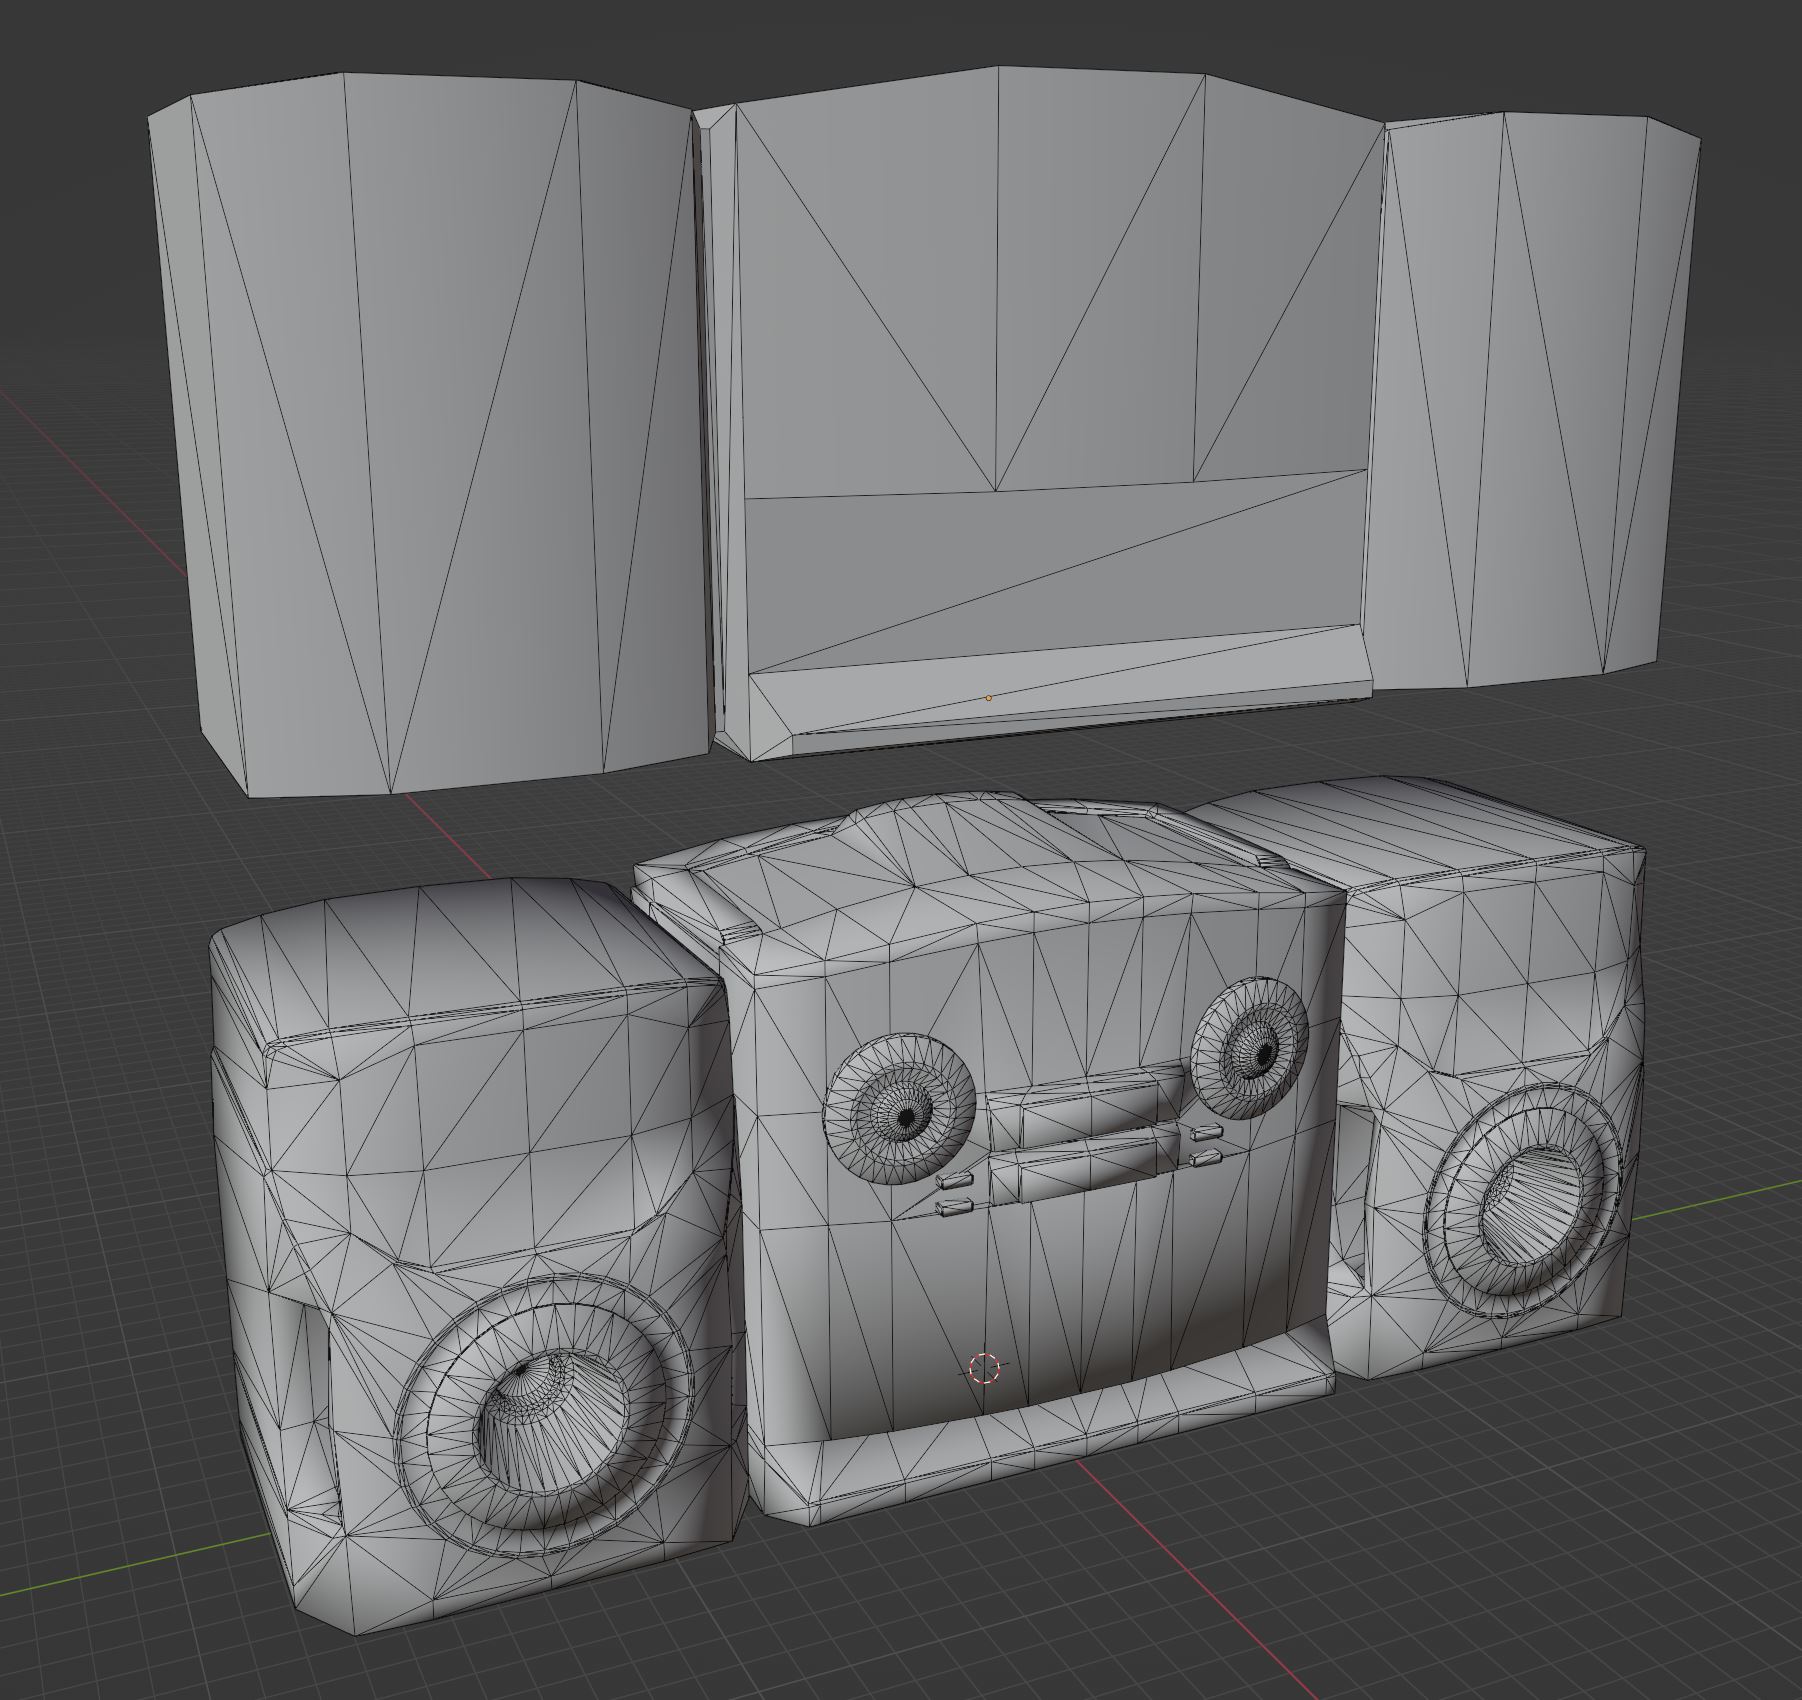
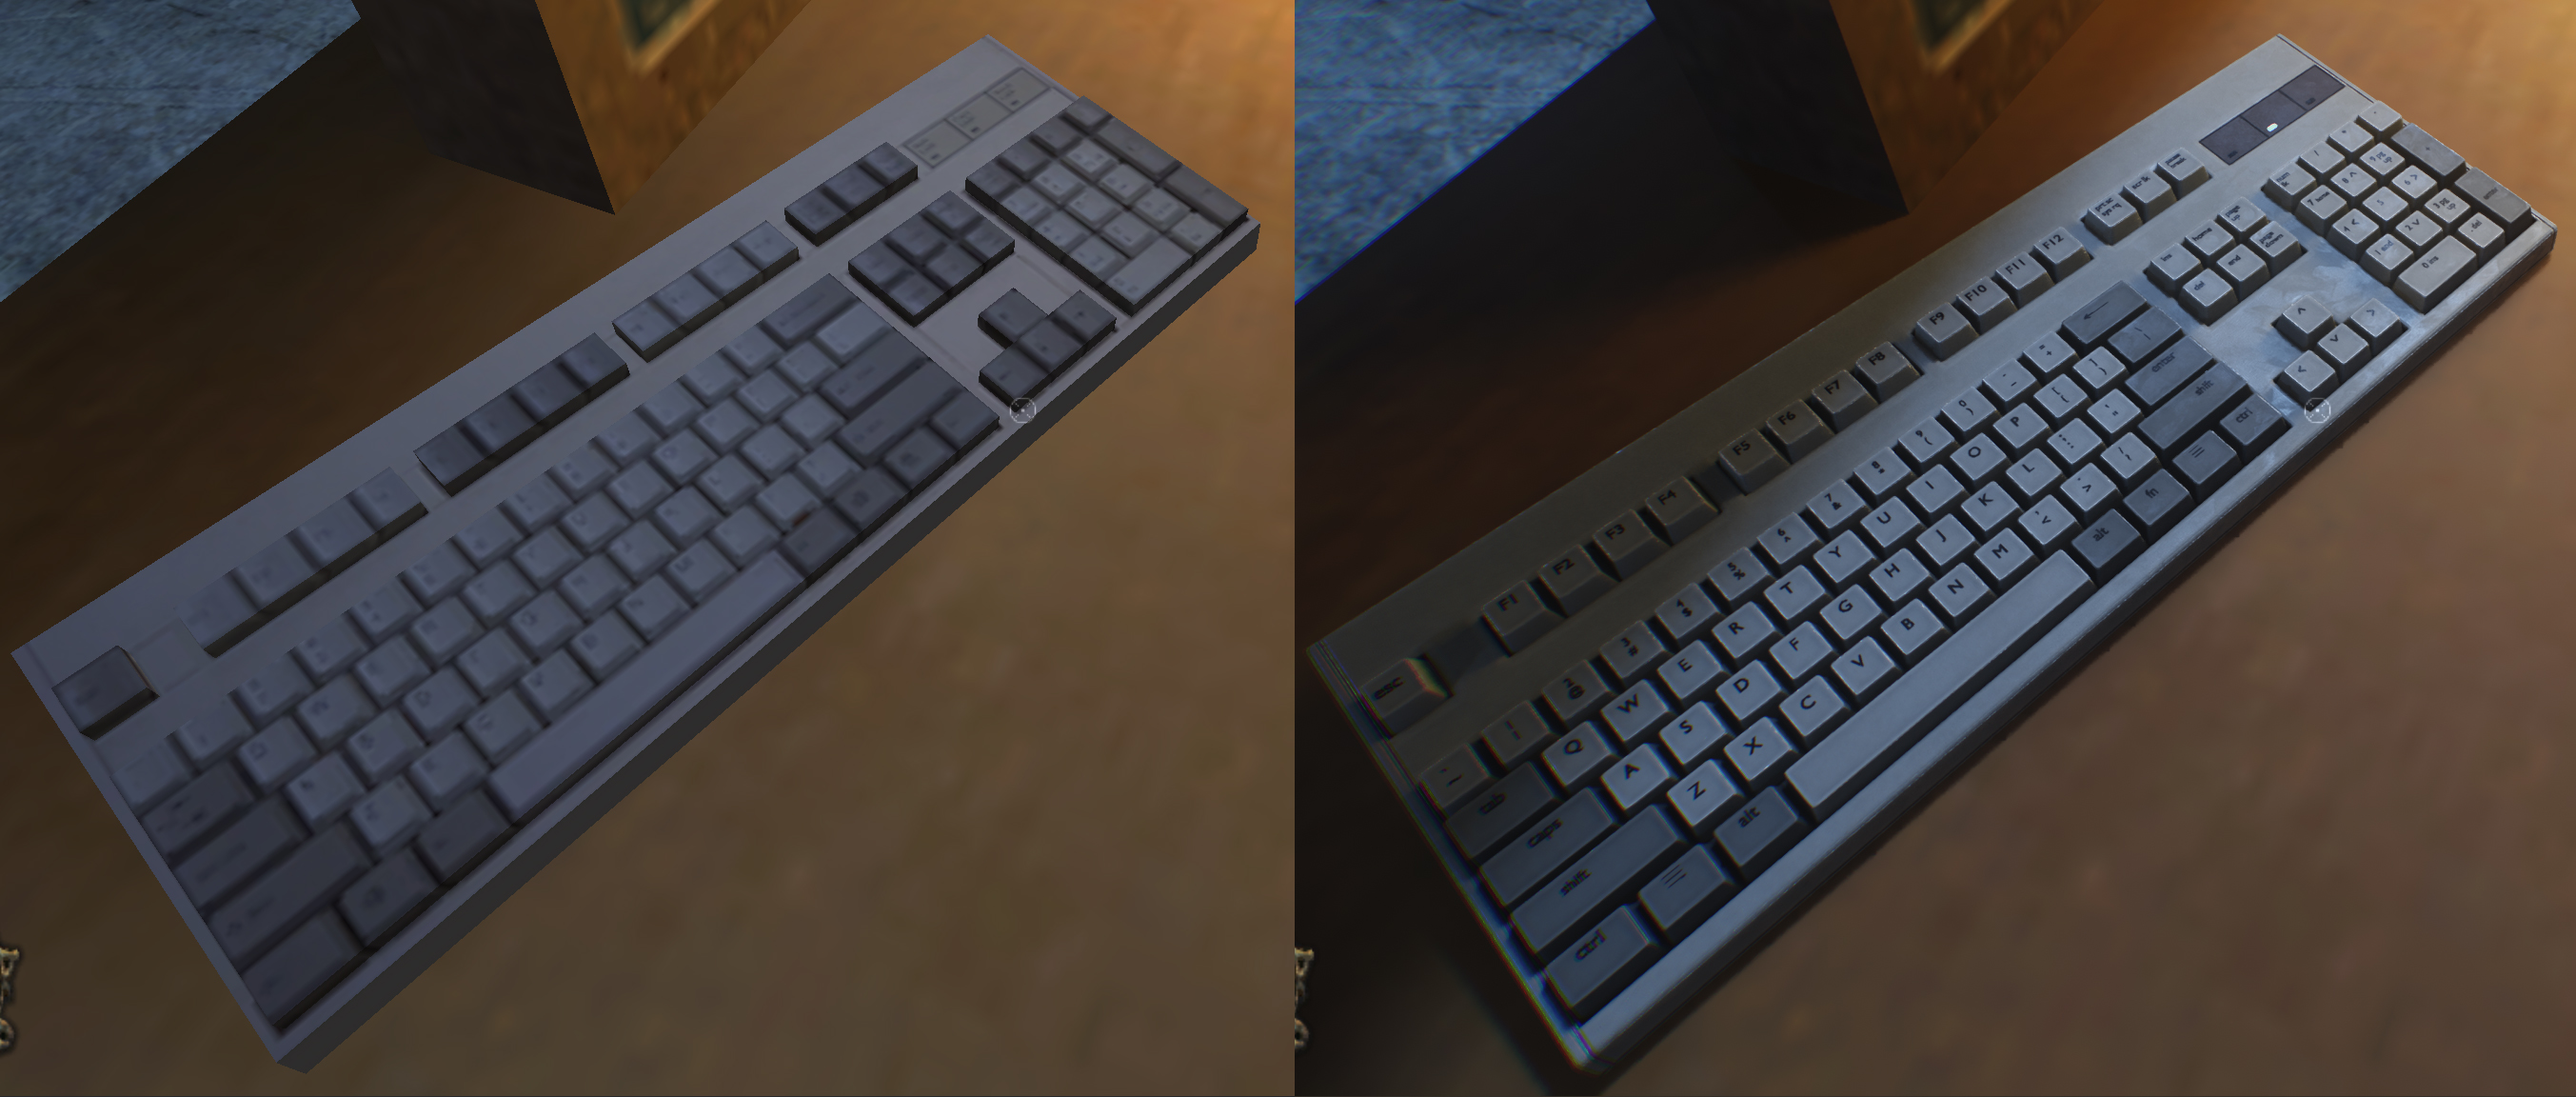
On top is the original model wirefarme, below is my new model's wireframe. Notice I'm still trying to keep my tri count relatively low.
Texturing:
To texture, I use Marmoset Toolbag4, but there are plenty of other tools out there as well, like Substance Painter.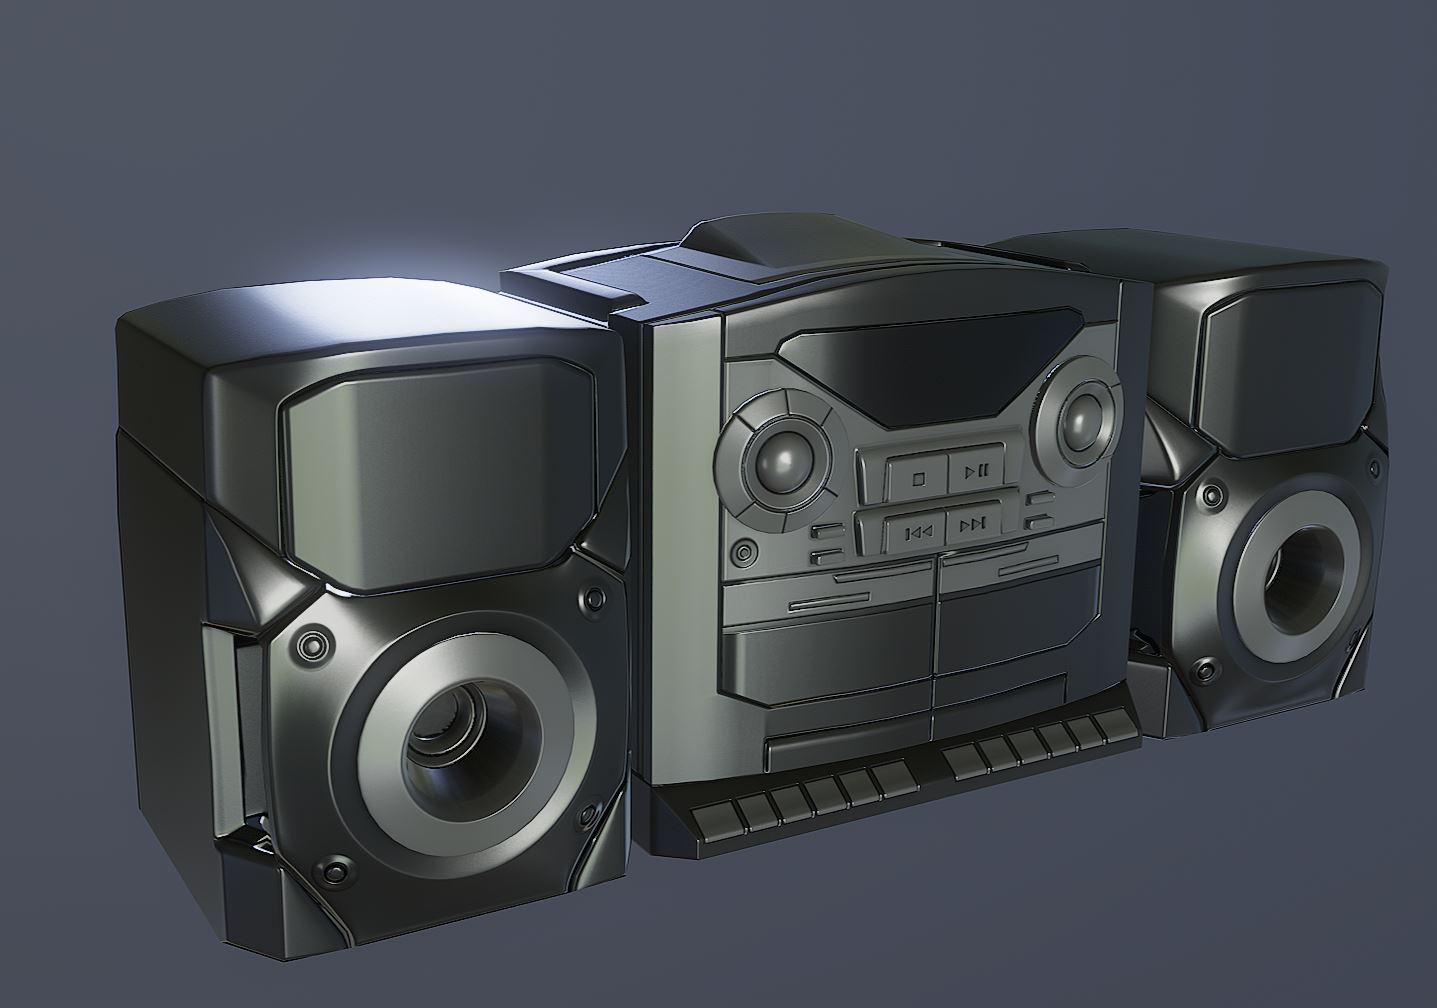
After the initial Hi-Poly to low poly bake, we have our base maps. Things like our base Albedo, Normal Map, Ambient Occlusion map etc. This will allow us to build up our texture procedurally using the material library in Toolbag or Substance Painter for example.
If the material library is lacking, we can always make our own from scratch using Substance Designer or cheaper but effective equivalents.
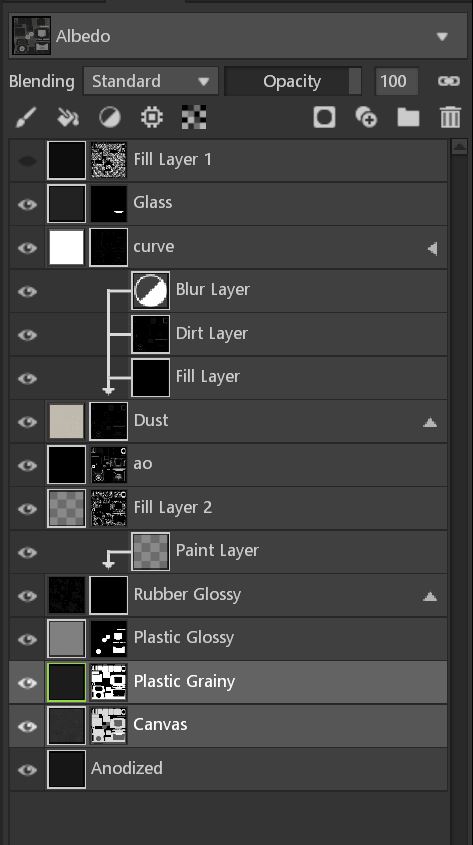
You can see I'm working in multiple layer of plastic, metal, and dust as well as some smearing to create something that looks a bit weathered.
Luckily, Toolbag had some great materials in the library to lean on, I was able to mask these off and add scratches and wear to create a more finished looking radio.
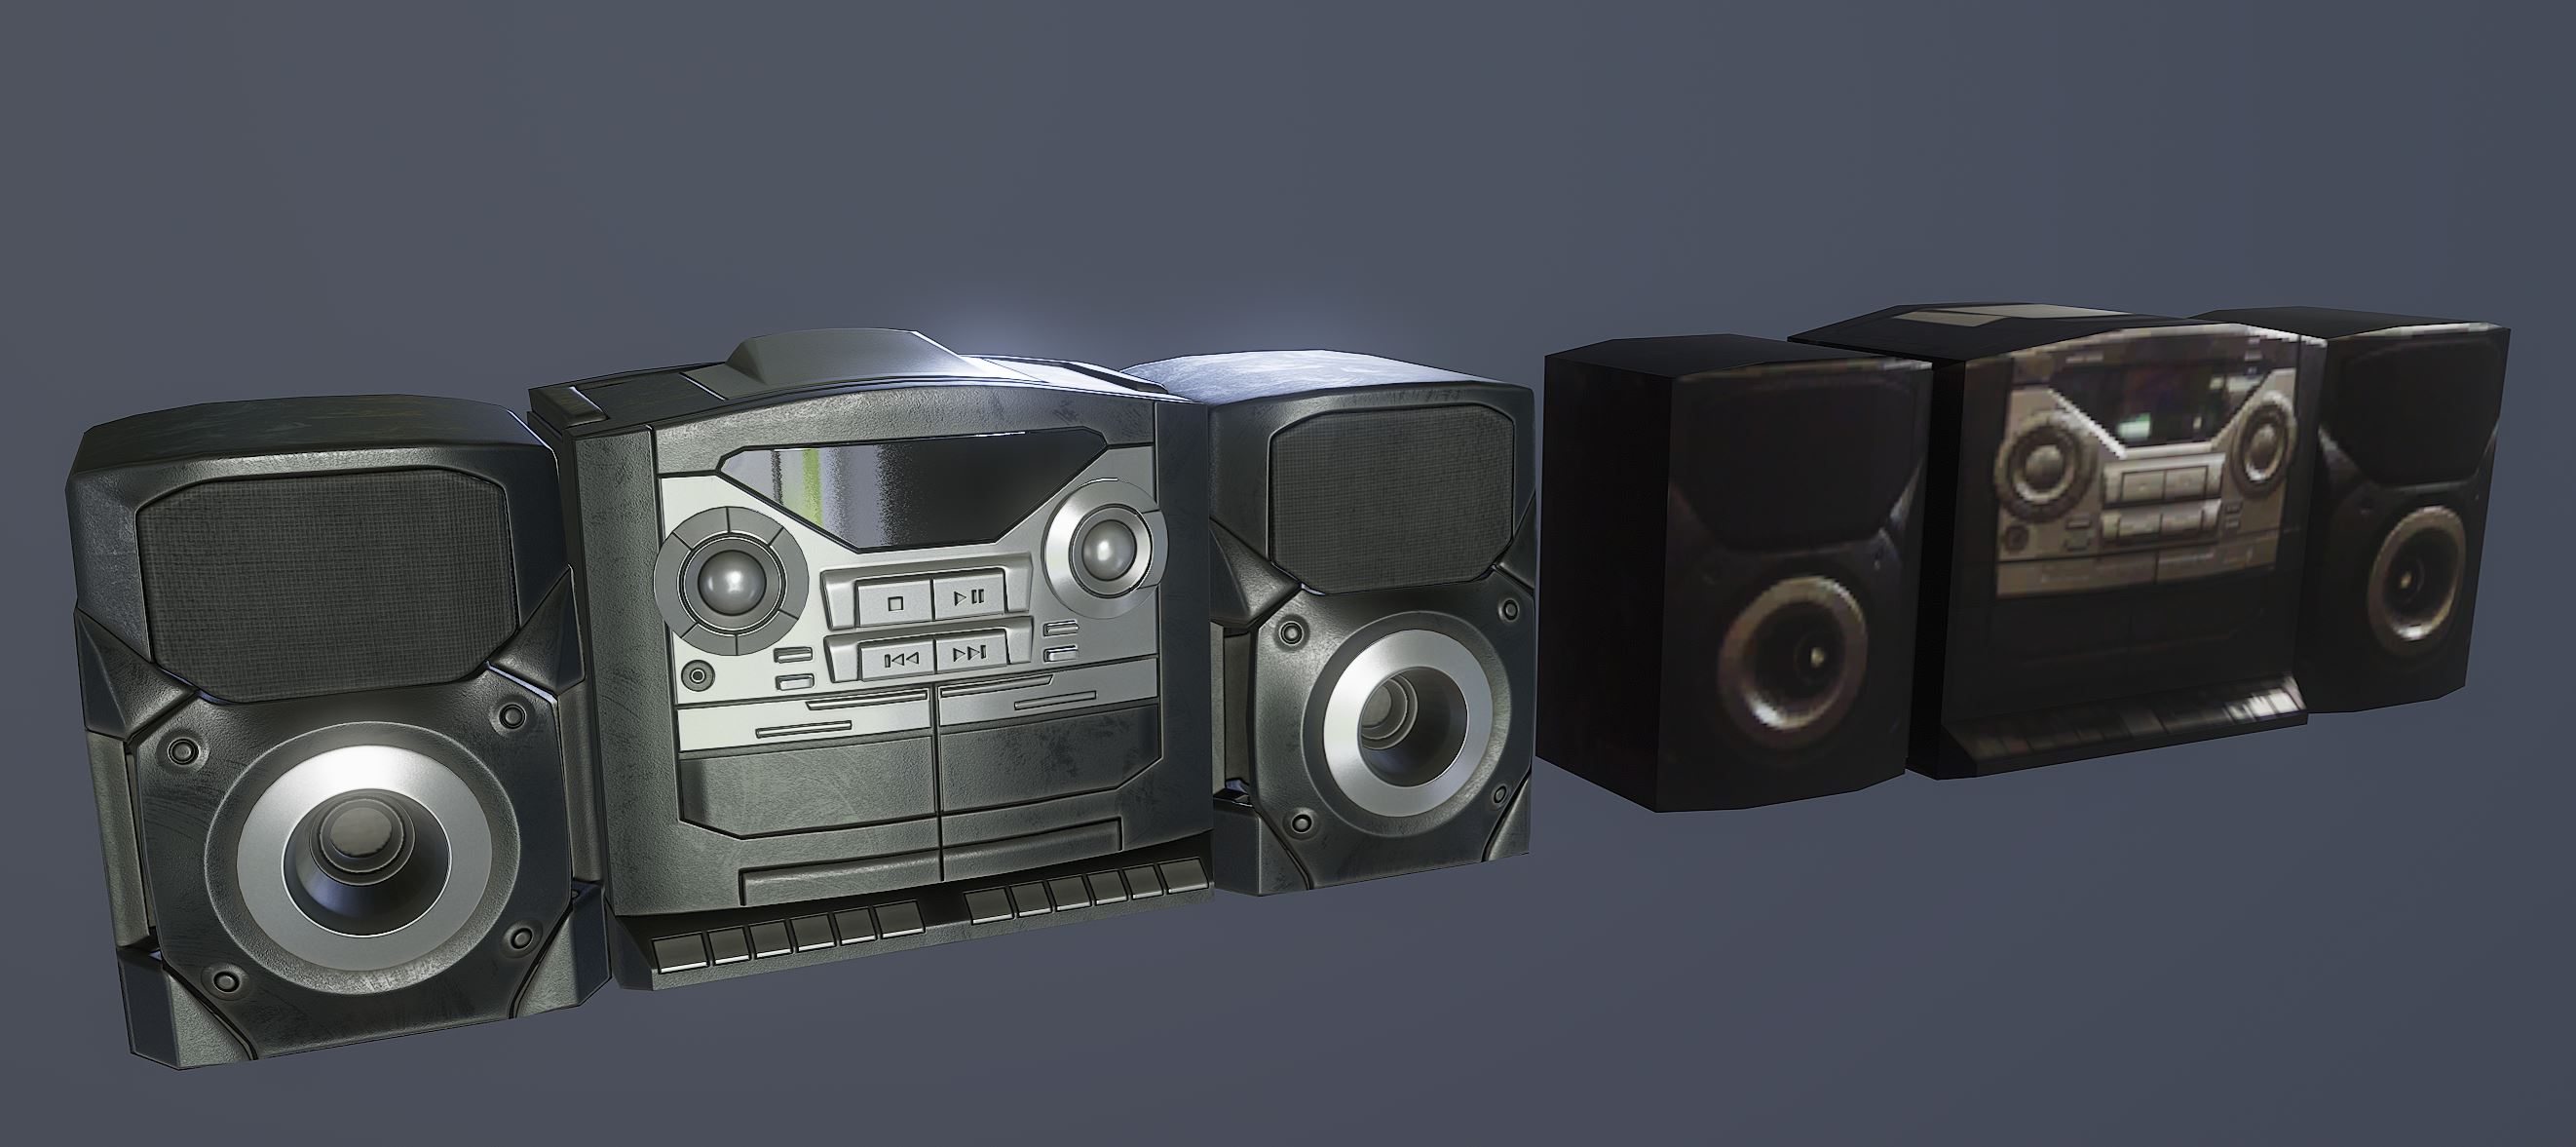
You can see a pretty big difference. A lot of VTM:B's textures were literally just photos taken from google, or magazines, you can sometimes still see the text from the website or page in the texture file! They often include environment lighting in them. But we need to pull that OUT. We want to let Remix's lighting and Physically based rendering introduce the environment lighting back INTO the model during run time.
So for our purposes, we want to pull out that lighting detail and genericize it a bit, I leave in a little bit of the AO and some directional gradients just to make it pop, but trying to achieve a more 'lightless' color in the Albedo map, and not presupposing a lighting source in the texture can help this fit into the Ray Traced lighting it will be getting through Remix.
Conclusion:
And that's that. I do this for literally everything. Props, characters, weapons, even some textures. I'll do some breakdowns of those later, but they will be much briefer since the basis of it is all here.
Hopefully you might have started to realize... "Hey wait a minute... I could totally do this!"
And yeah, you absolutely can. This Remaster is just one interpretation of Vampire The Masquerade: Bloodlines. And hey, it might not look like the one you are picturing in your head.
But that's the beauty of this, you can do YOUR version too. I hope a lot of other people start to get interested in Remix and modding, I'd love to see lot's of remasters for VTM:B and other games as well, not just the one that is in my head!
Thanks for checking this out and reading! I know it was pretty dense! As a reward.
I'll toss in some bonus images for making it this far ;3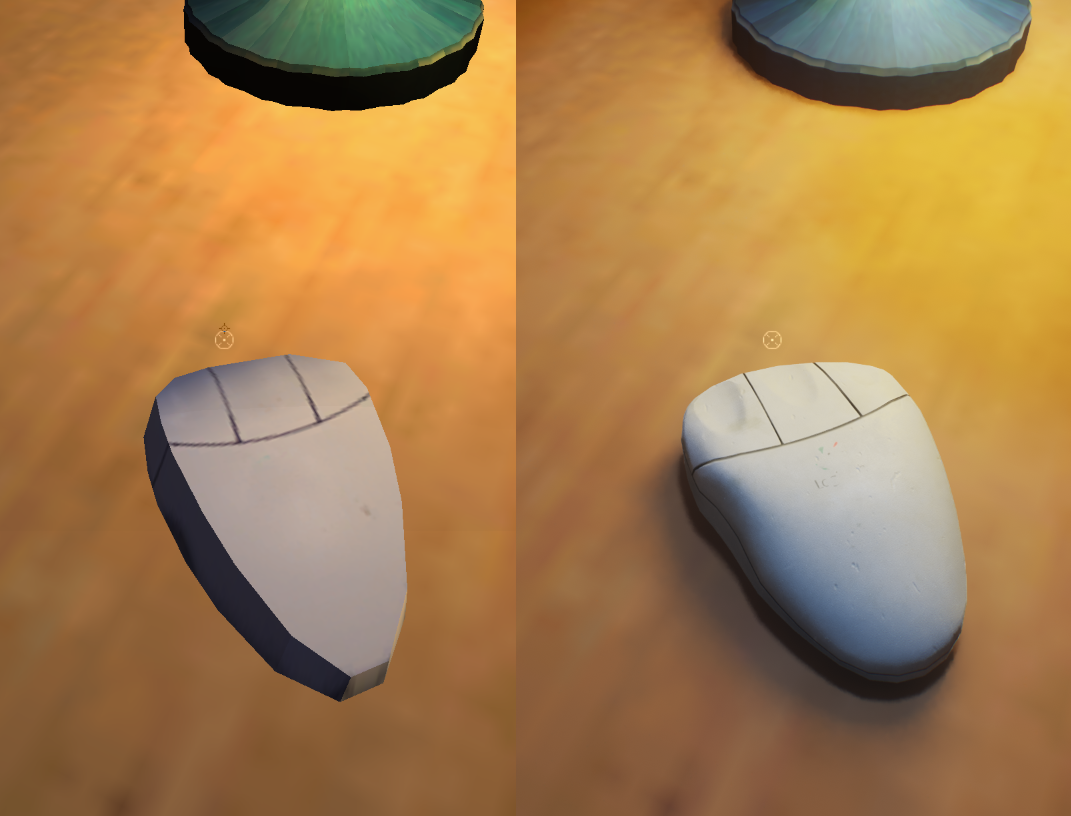
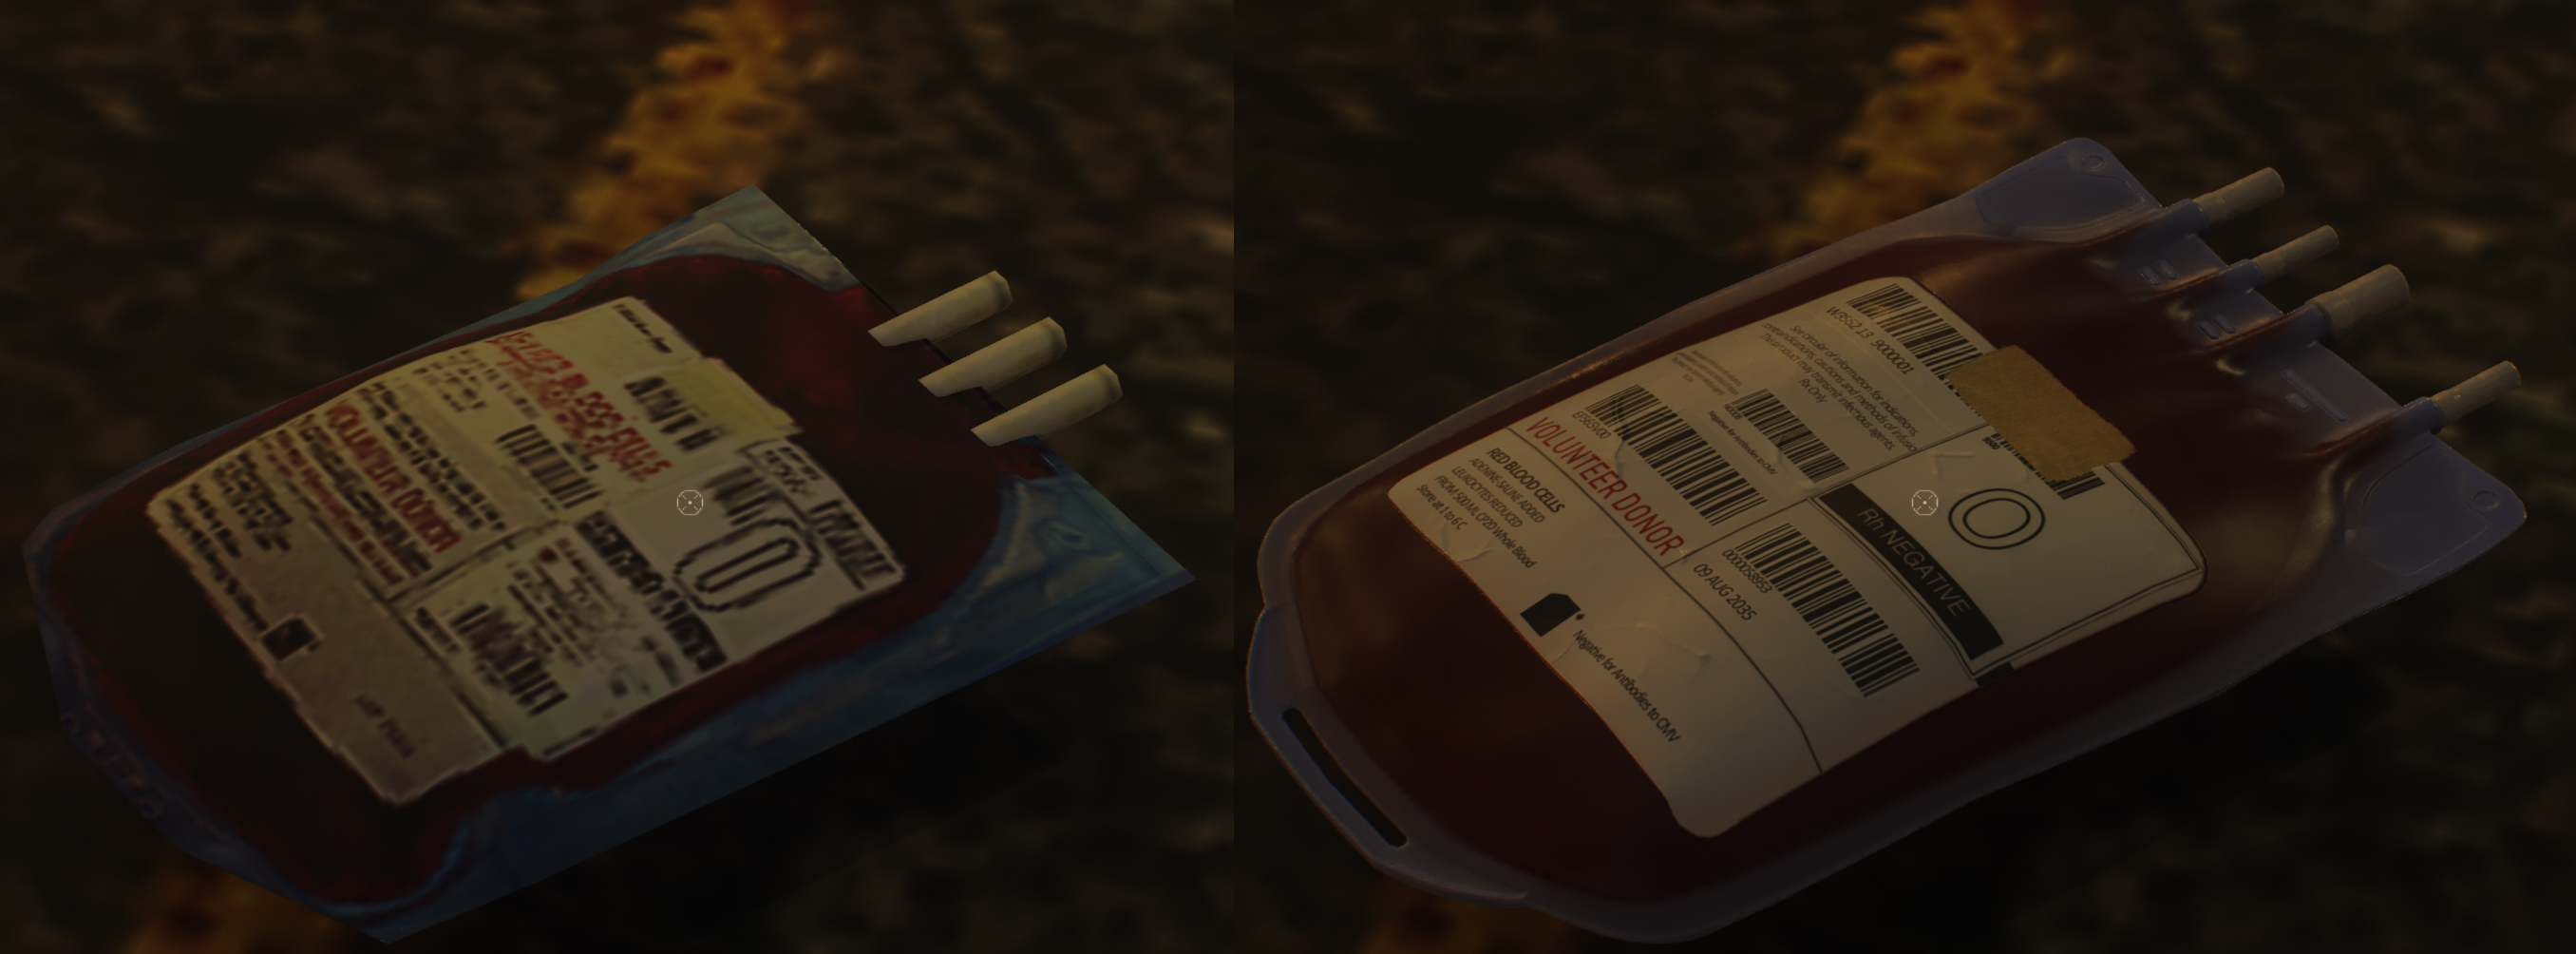
Thanks again! Stay tuned!

Vampire The Masquerade: Bloodlines - RTX Remaster Announcement Post
News 9 commentsVampire The Masquerade: Bloodlines - RTX Remaster Announcement, explanation, and plans.




This comment is currently awaiting admin approval, join now to view.
Great modeling work! RTX-Remix has made me buy more older games than newer ones as of late - adding this one to the cart!
Awesome! And thanks for checking out my progress, going to drop some more soon!
Can is use this mod with no problem even if my PC is weaker?
I think you need at least an RTX card to run the Remix software that injects the renderer.
If you make a Patreon or anything I'd immediately support this. This was the main game I wanted to see RTX Remix touch.
I've definitely been thinking about a Patreon. Wondering how I'd handle it! Also, VTMB was the game that popped into my head IMMEDIATELY when they did the initial press release for the tech a year or so ago!
Holy mother of Kain, this is incredible. I hope you make it to the end of this project, maybe a Patreon would go over well? This is what we need right now after the Bloodlines 2 fiasco.
Thanks for your support! Still hammering away on assets, getting close to being done with the models for this proof of concept test, then it's onto the textures! Will show some progress soon!
Also I'm definitely scared about BL2, I really want the version we almost got. Though their most recent blog looked like it had some nice open world areas, I might be foolish to still be a bit hopeful?
i love you
Take me out for some Chipotle first or something, my gosh.