Tutorial written by StrYdeR. Mirrored here for archival purposes.
Creating and Using Custom Textures
StrYdeR shows you how to create and use custom textures in CoD2
OK - so you want custom textures in your map...lets get to it then.
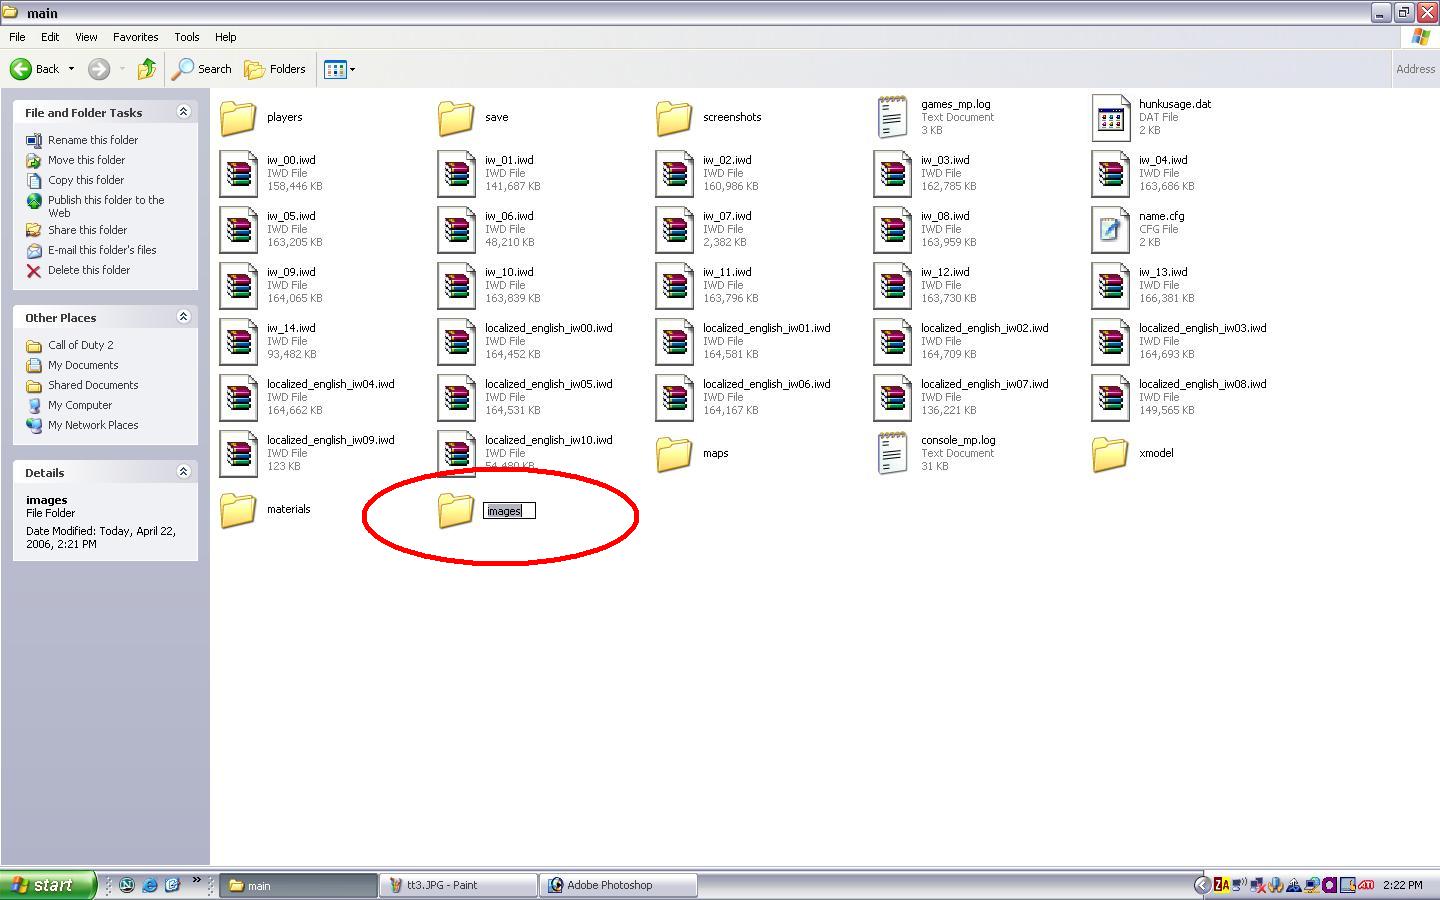
Browse to your install directory (usually C:/Program Files/Activision/Call of Duty 2) and locate the /main/ folder. Right-click and create a new folder.
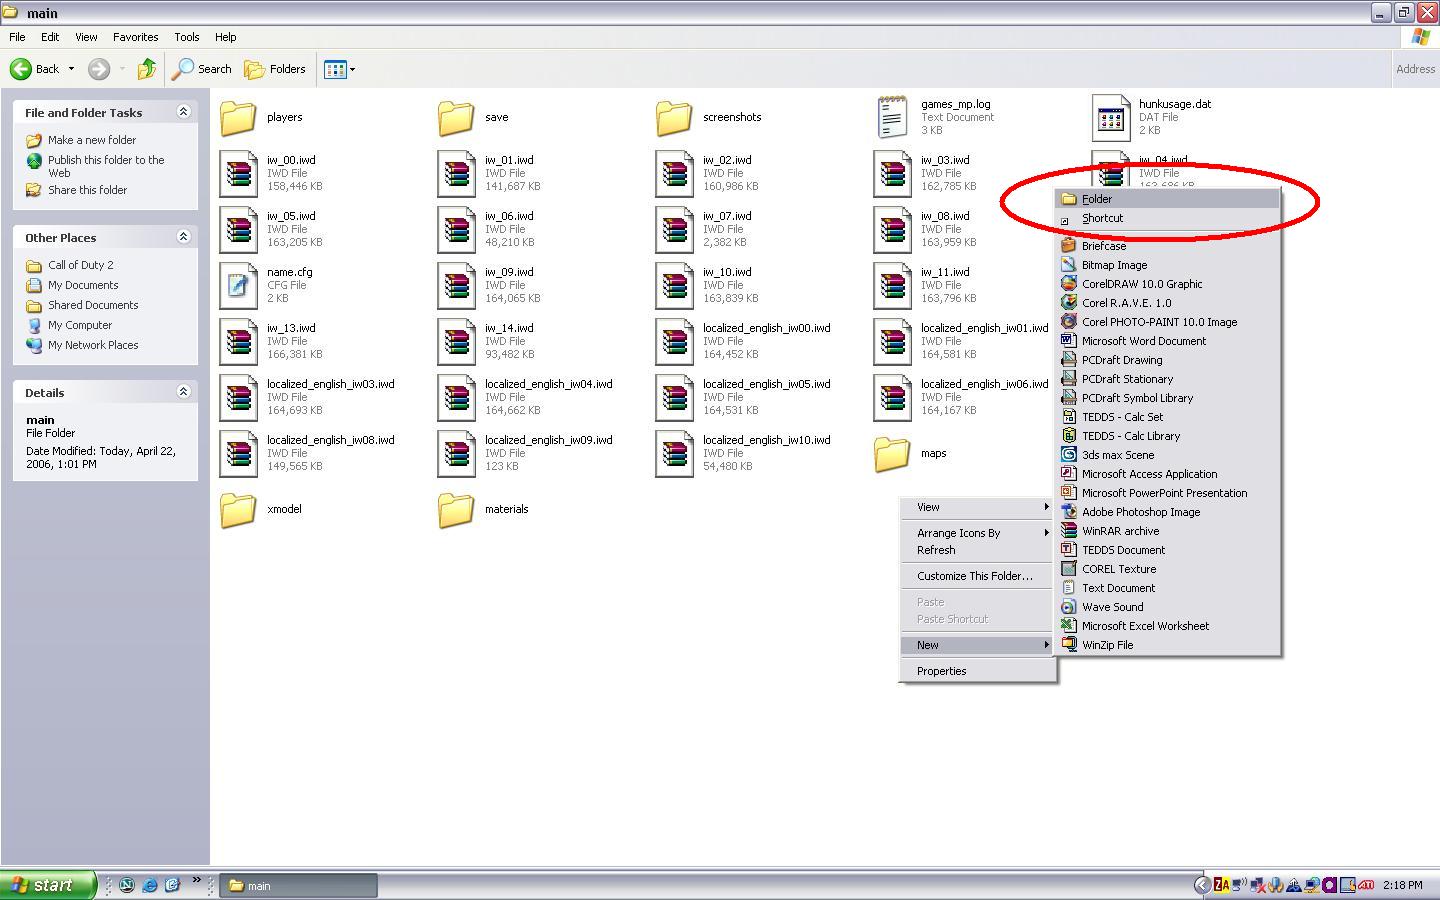
Name this folder /images/ (case and spelling are very important)
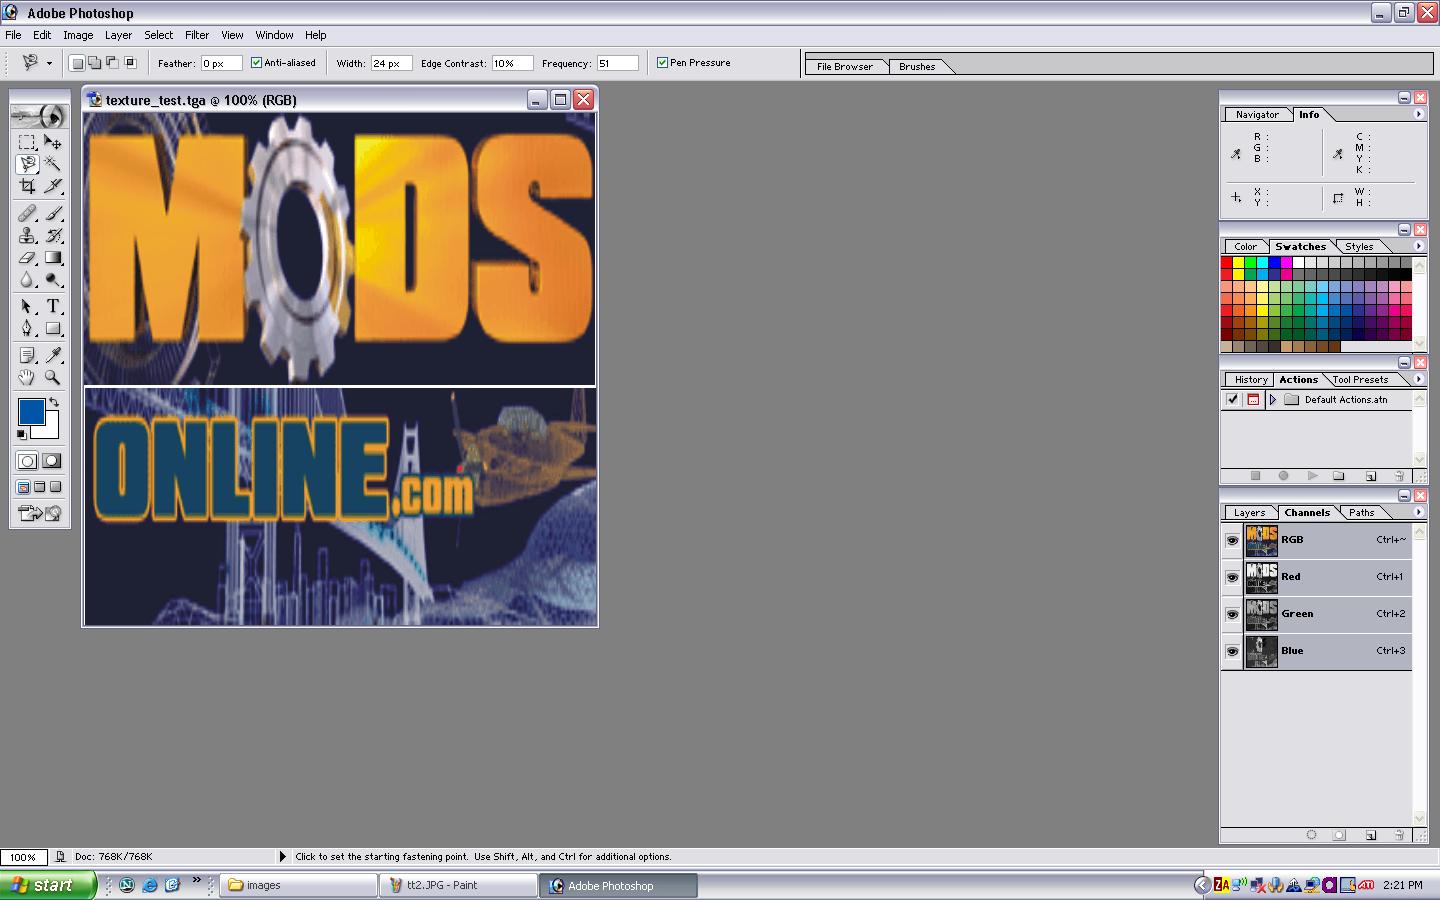
Now in your paint program, photoshop, or whatever image program you use (I am using PS7) create your image in a size of the power of 2. I have created my image 512x512.
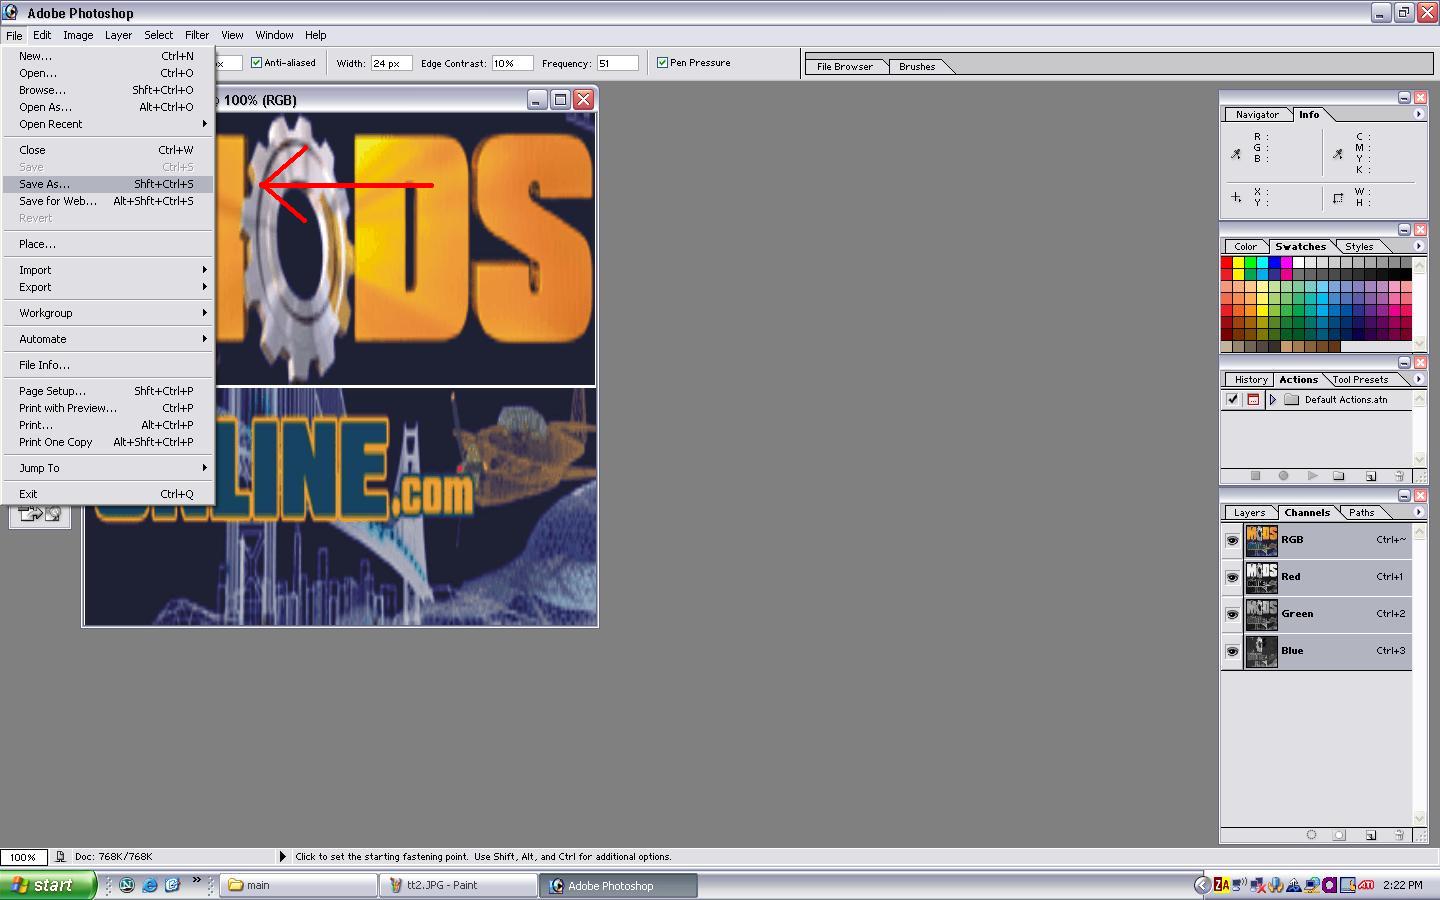
Now we need to save this file as a .dds format image. I have already installed the plugin for photoshop, and as it is readily available on the web, i won't go into the hows of doing so. So, we click file --> save as -->
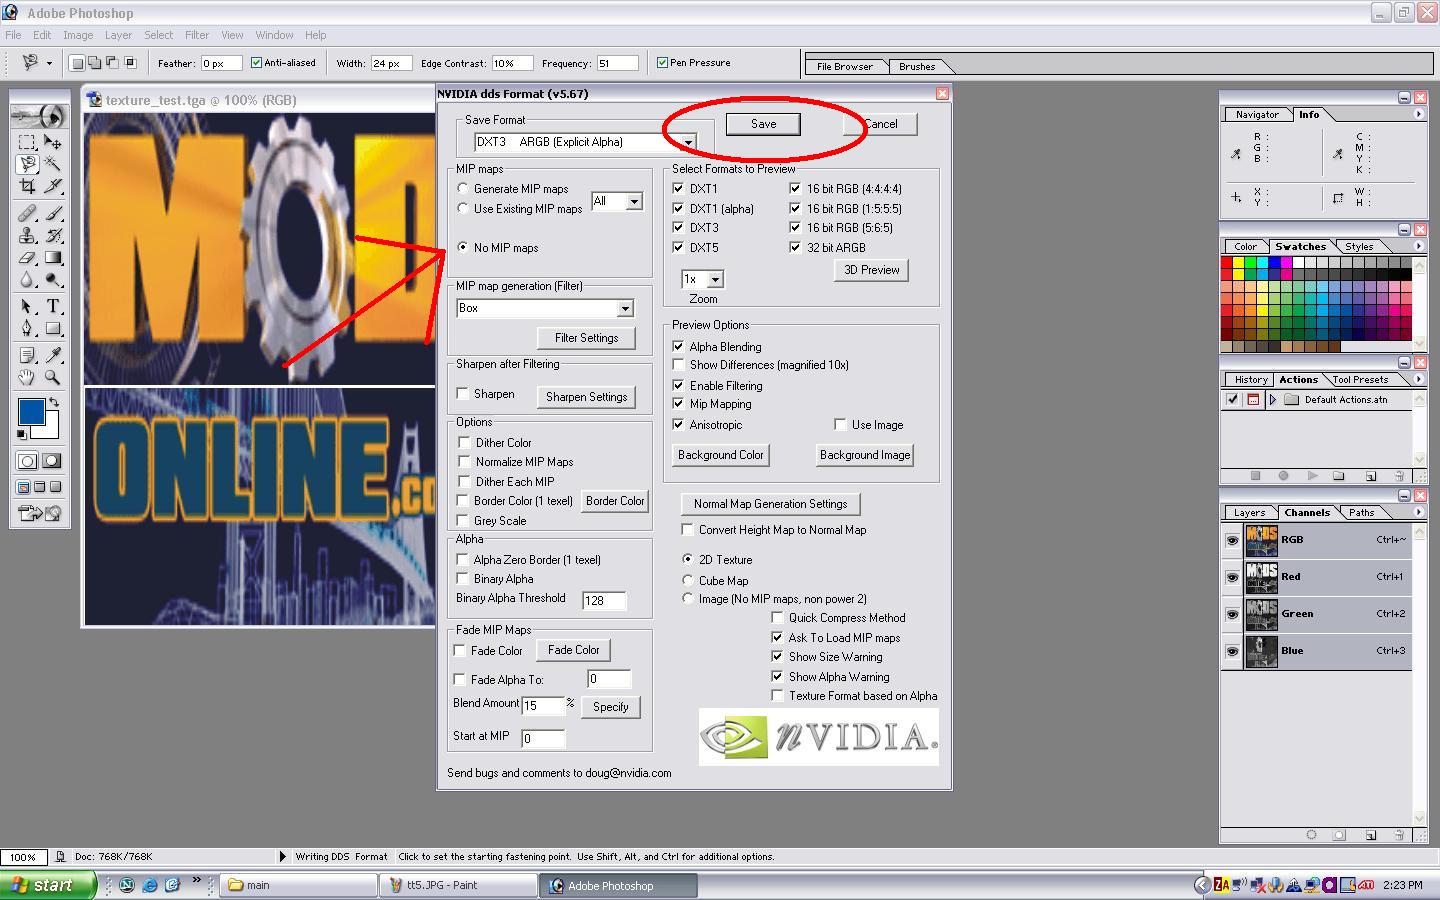
And when the window pops up we locate the /images/ folder we created in our basepath and select .dds

For our basic texture we are going to turn off mipmaps and then save or texture. It is important to note that your .dds name cannot have any special characters or spaces in the title...an underscore and alpha numerics are acceptable.
Now that is done, so we need to open our asset manager.
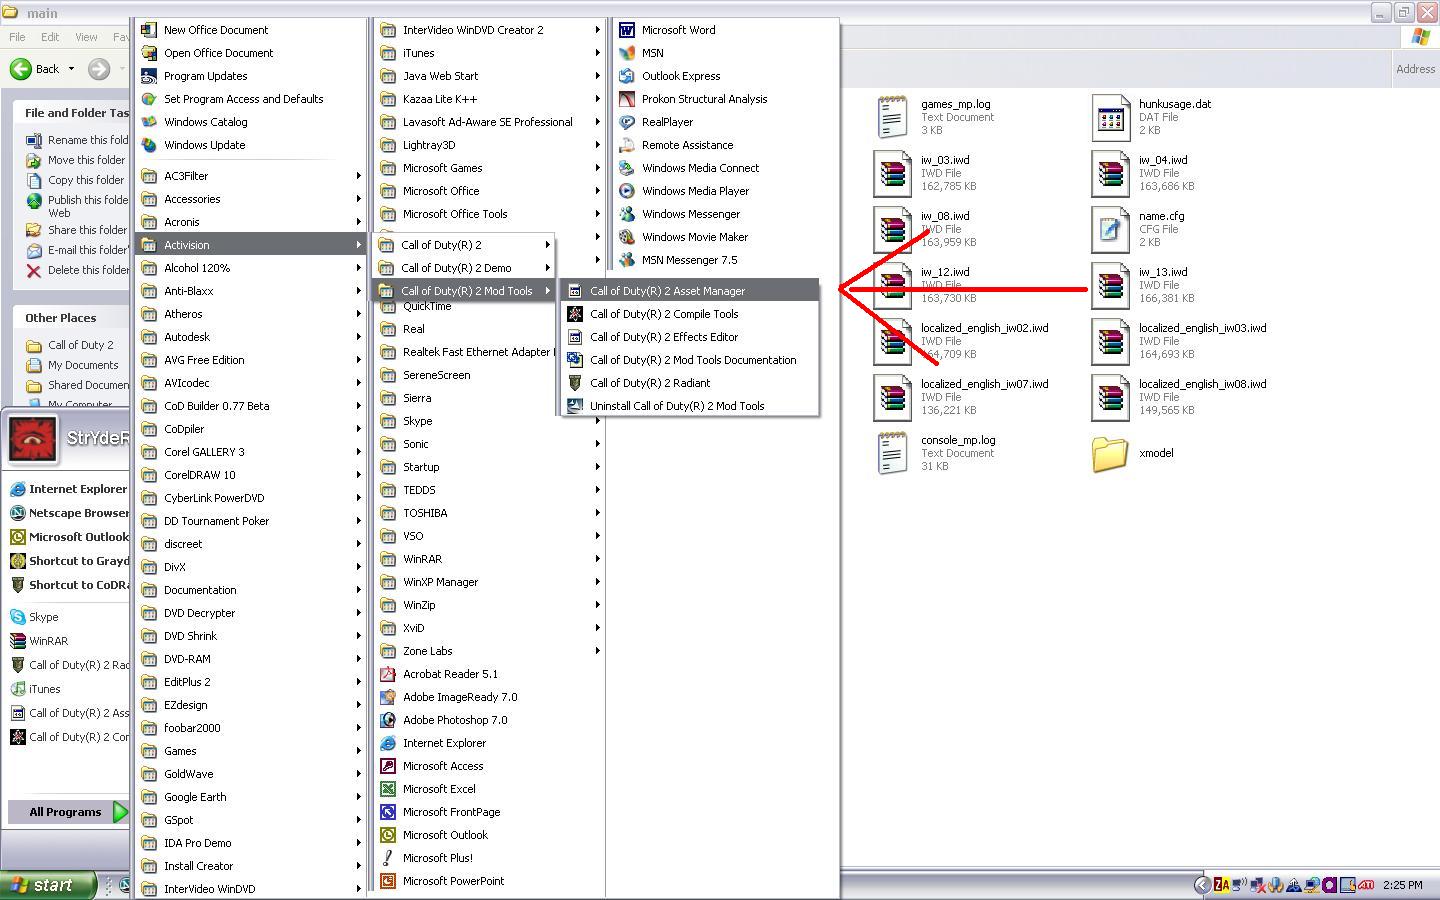
Click Start --> Program Files --> Activision --> Call of Duty 2 Mod Tools --> Asset Manager to load the program.
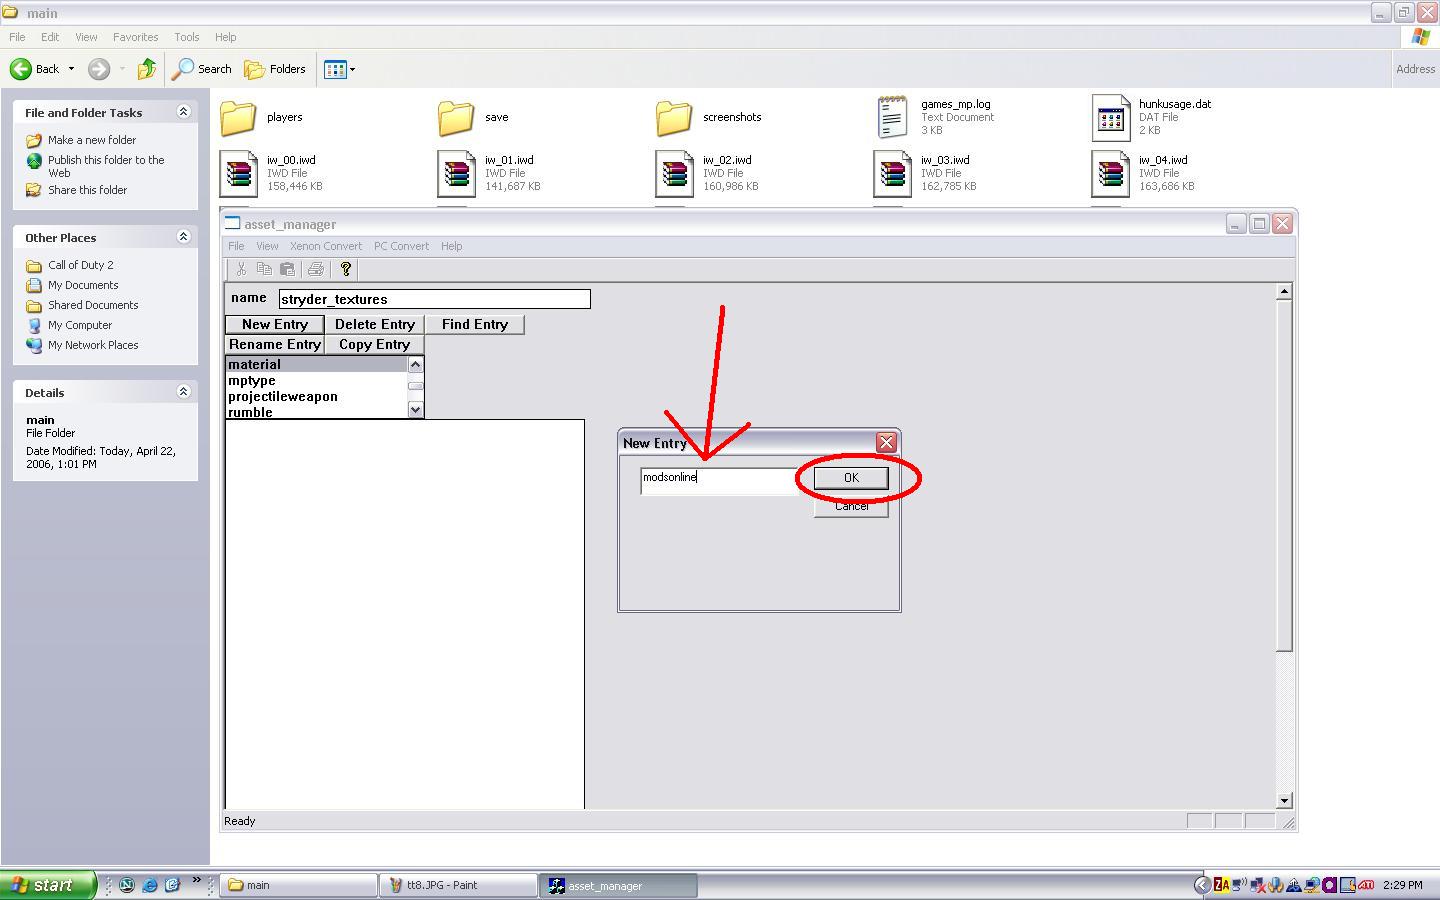
Select material on the asset list, then give your list a name. I am calling mine stryder_textures for this example. Then click the New Entry radio button.
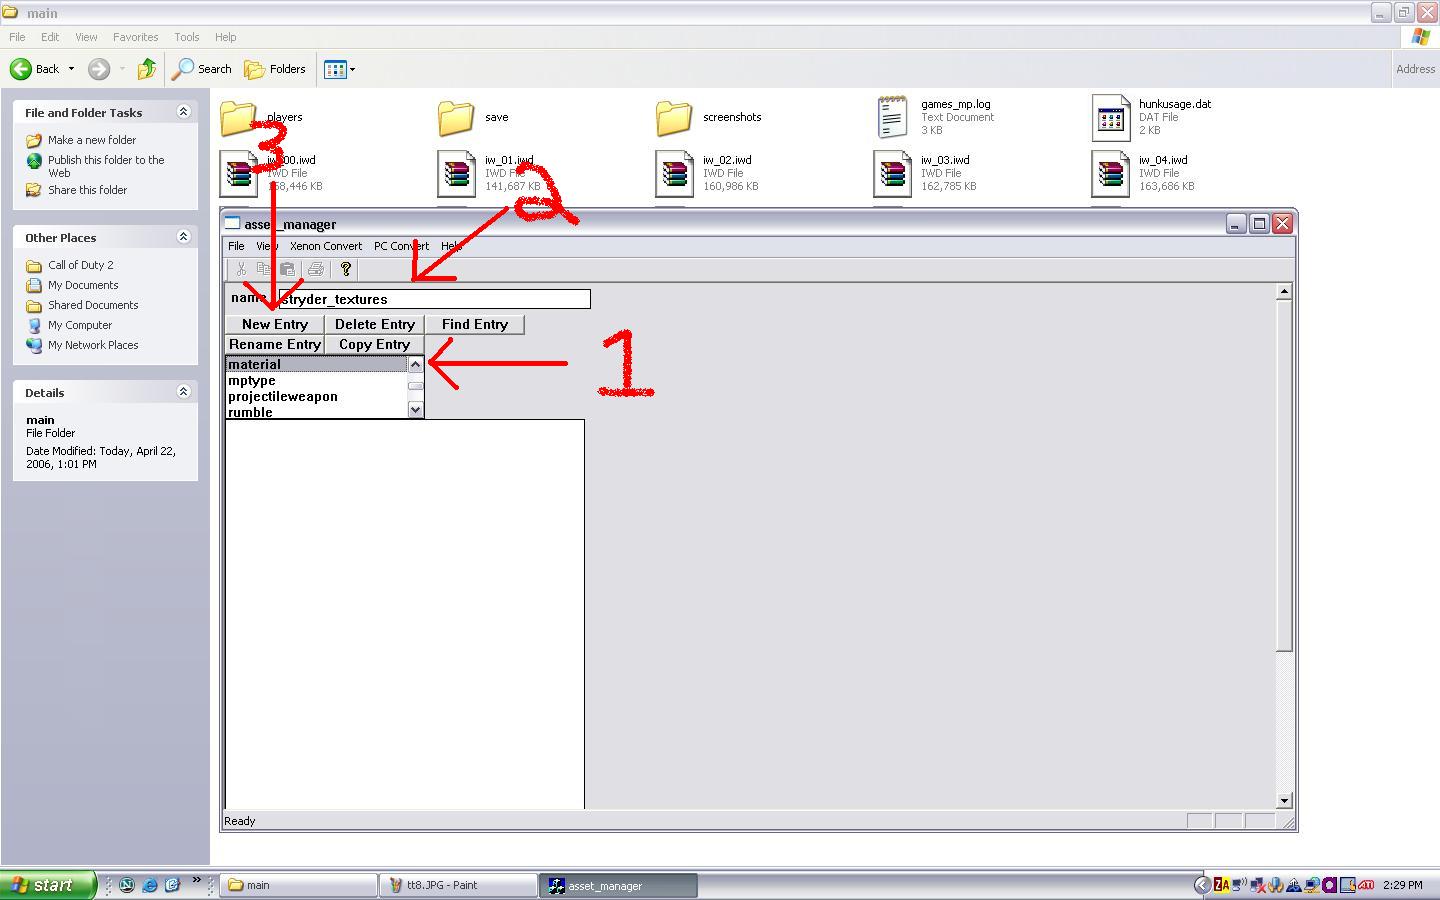
This is where you name your texture. Given the nature of our texture we are going to call it modsonline. It is important to note that your texture name cannot have any special characters or spaces in the title...an underscore and alpha numerics are acceptable.
I am not going to explain all of the options in this tutorial, some are self explanatory, and some are not, instead i am going to give you the basic settings to make your basic textures work.
The first thing we need to do is define the materialType. In this instance it is a world phong material type (basic all around material)
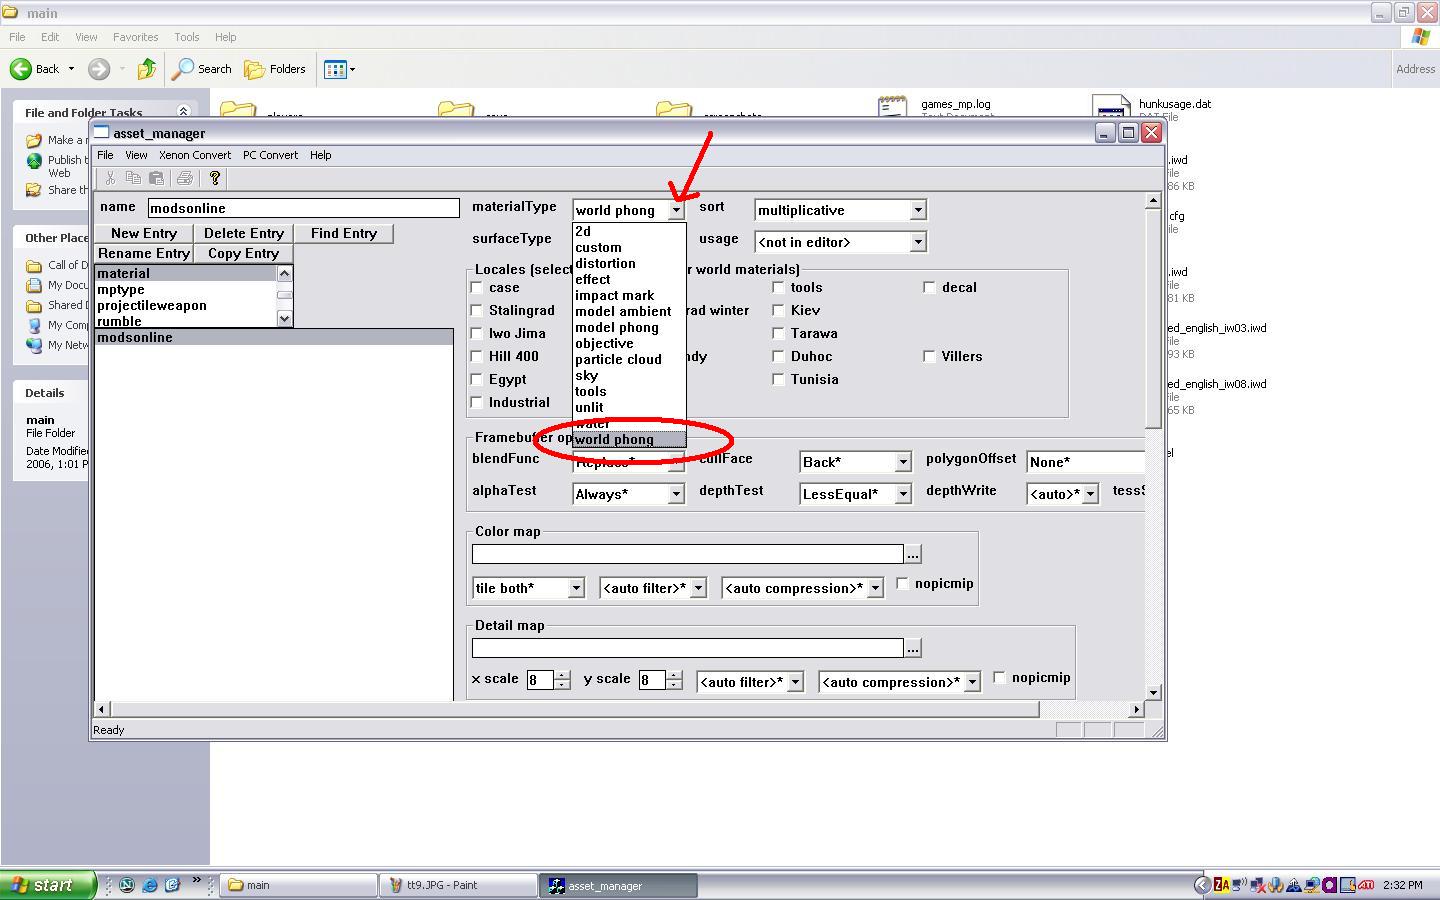
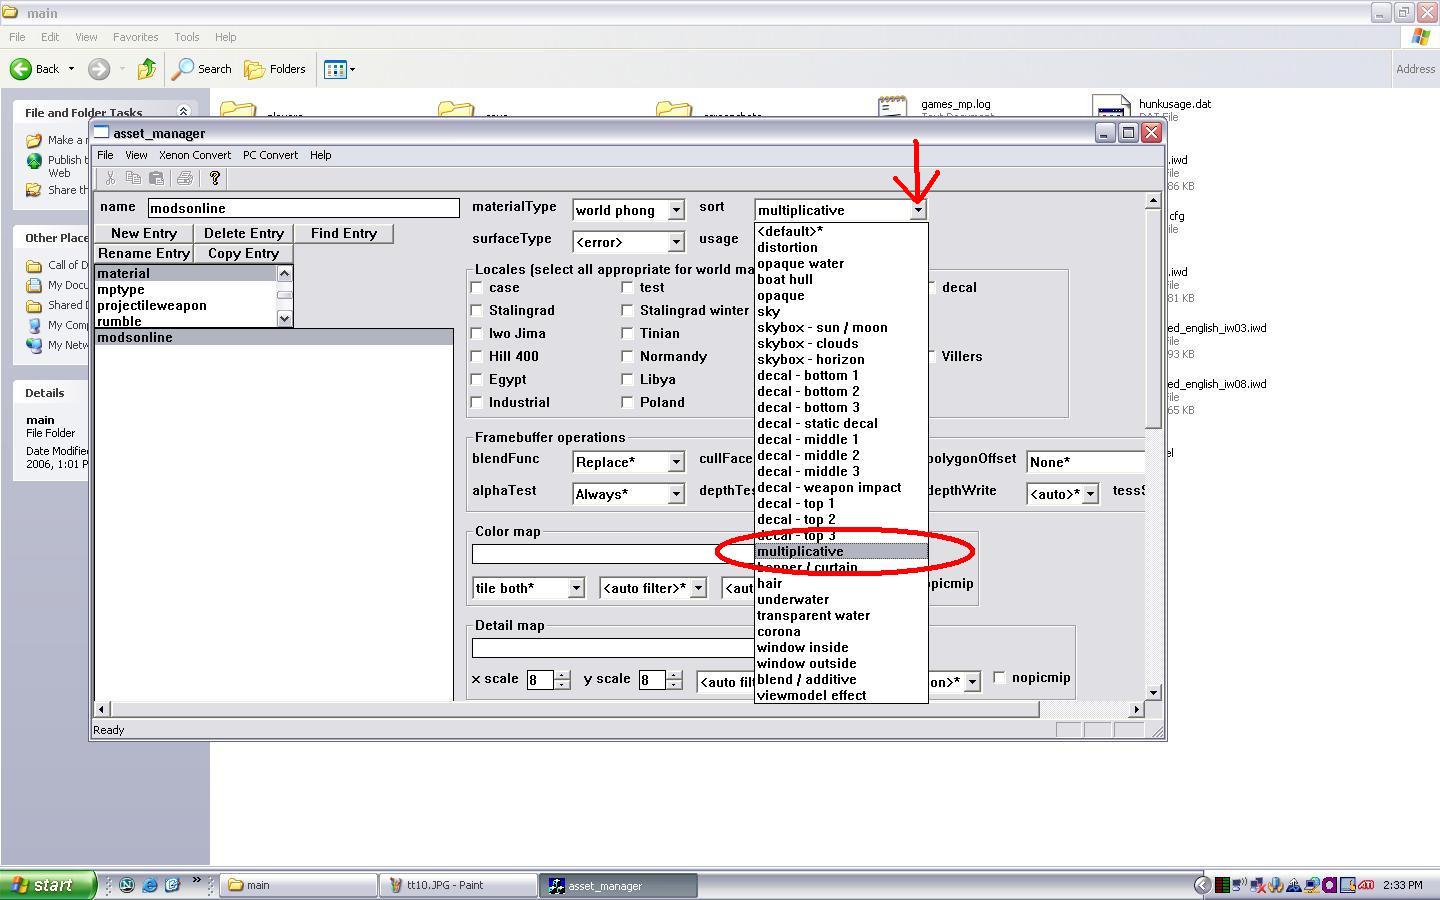
Next we need to define the material sort. In this instance our material is multiplicative (big word that means repeating).
*EDIT NUMBER ONE*
|OCG|=gLiTcH= reports that the material sort should be set to *default
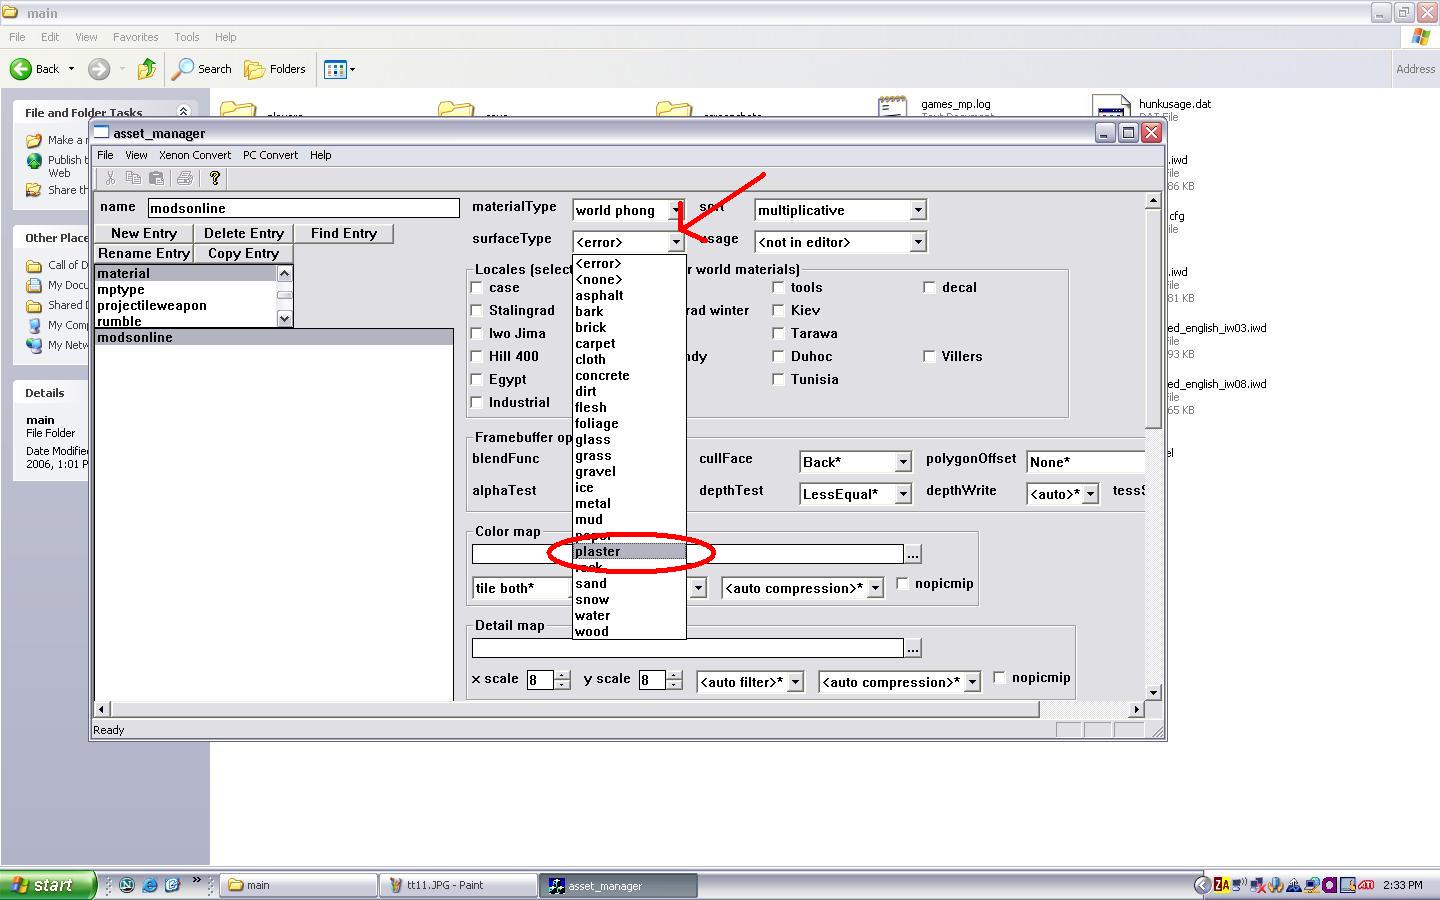
Here is where you can take a little artists license with your texture. How do you want it to react when shot? What type of mark? What type of effect will be played? For this example i am choosing a surfaceType of plaster.
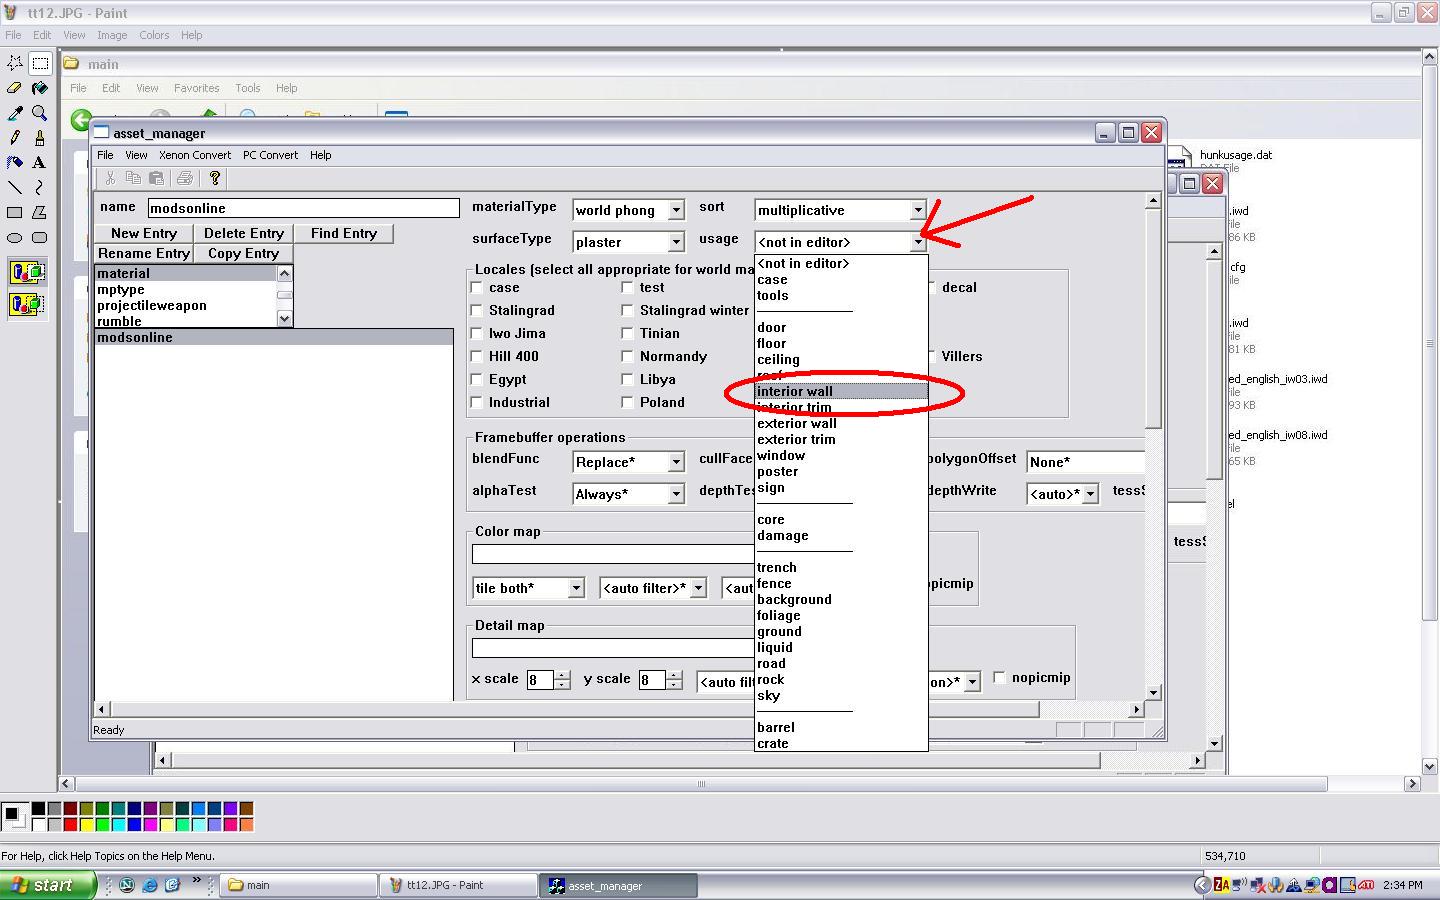
Now we have to define where we will see it in the editor. In the usage tab I am going to put this as an interior wall.
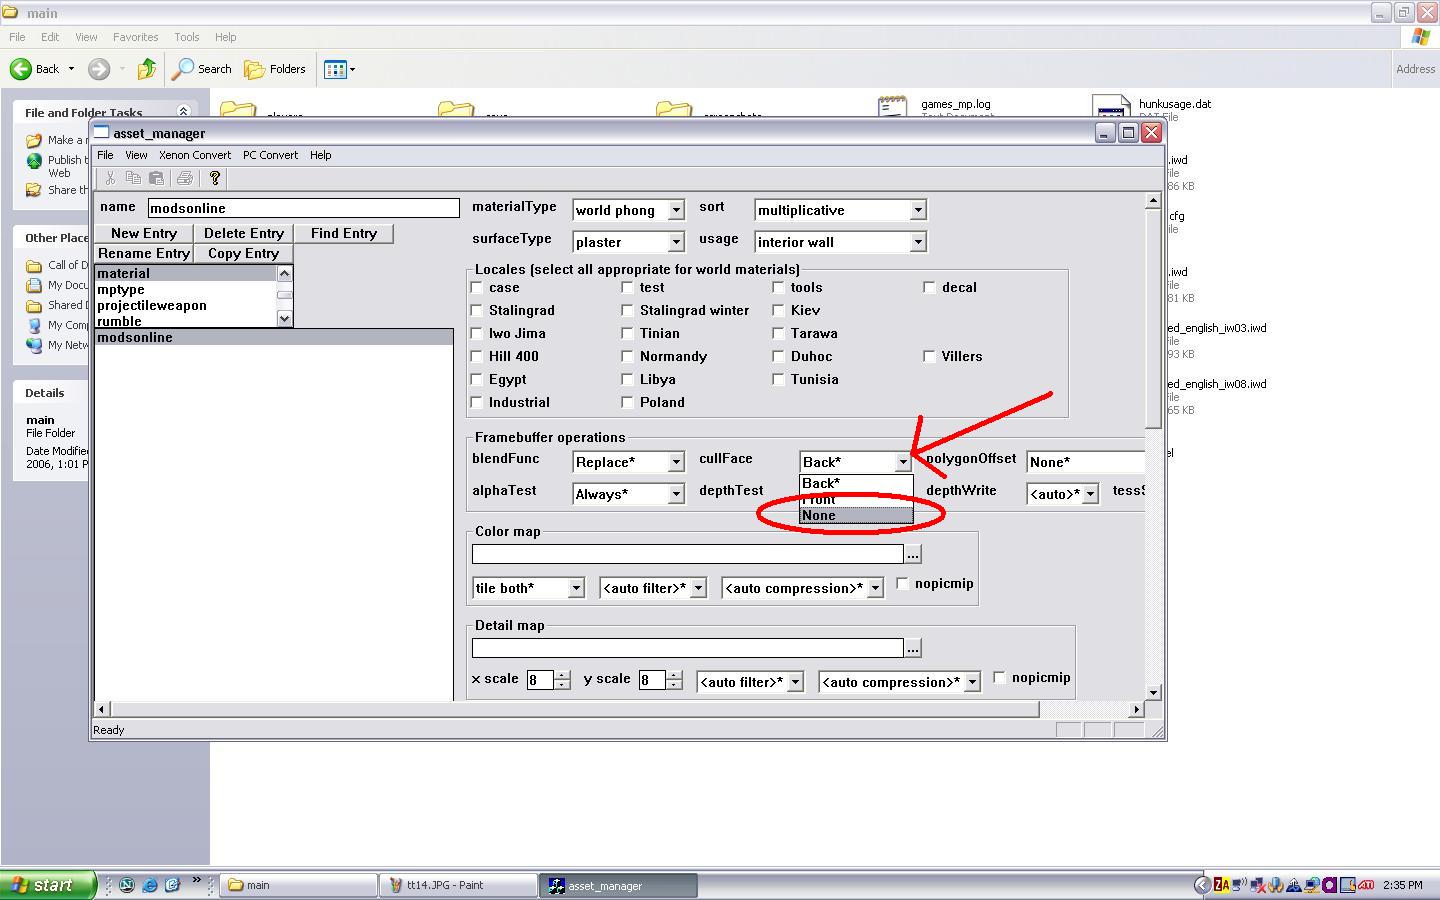
The frame buffer operations section is how our texture is optimised. In keeping this simple, we only need to change the cullFace option to none.
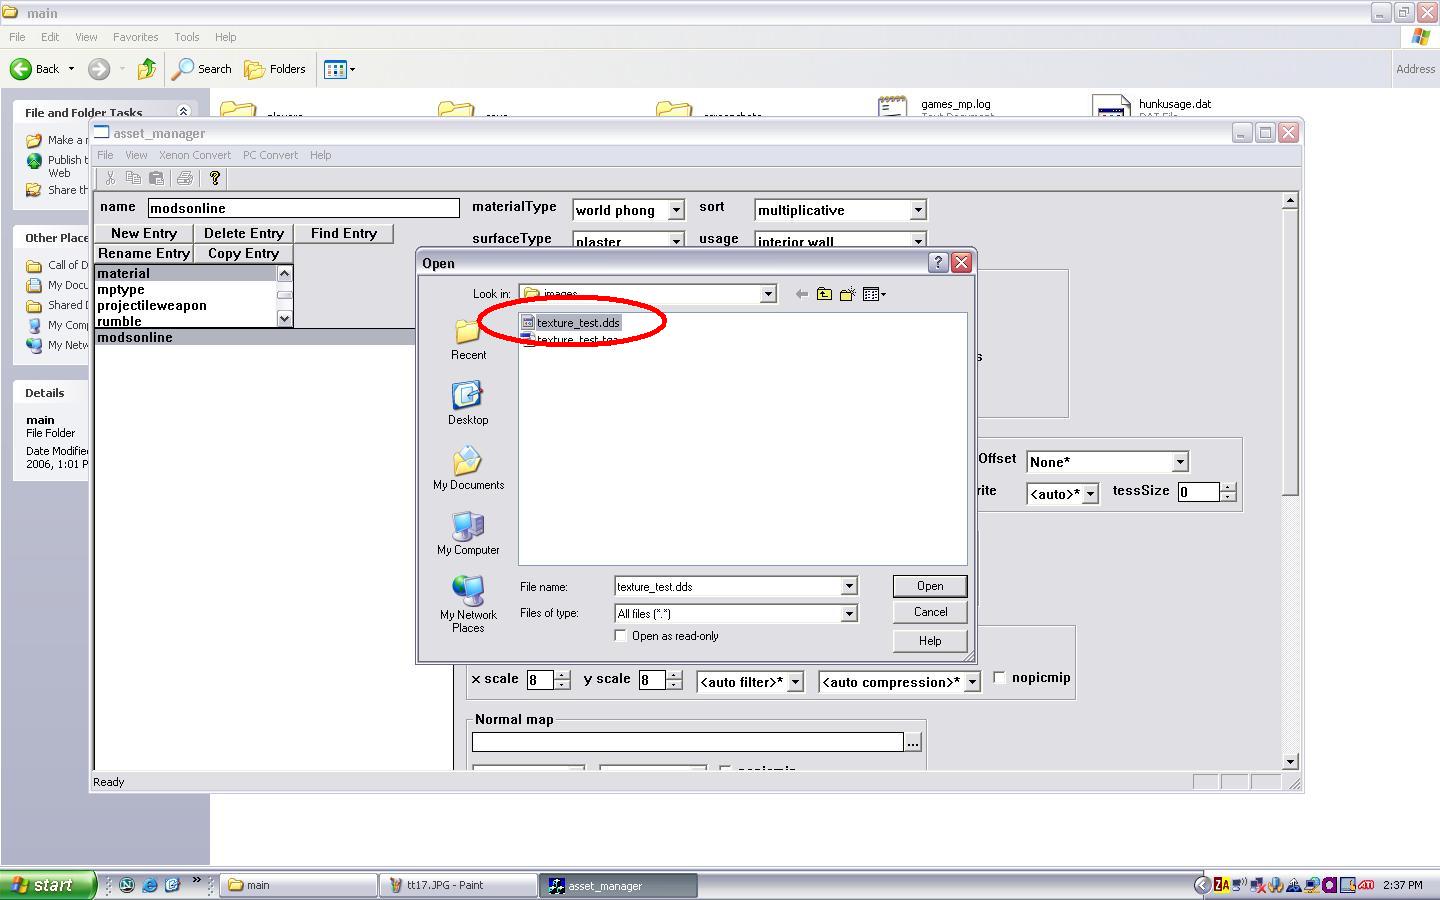
Now we need to tell the asset manager where to get our image for the texture. This is the Color map. Click the browse radio button and browse to the /images/ folder where we saved our .dds image.
Now, we need to save our .gdt (game data file). Click file --> save
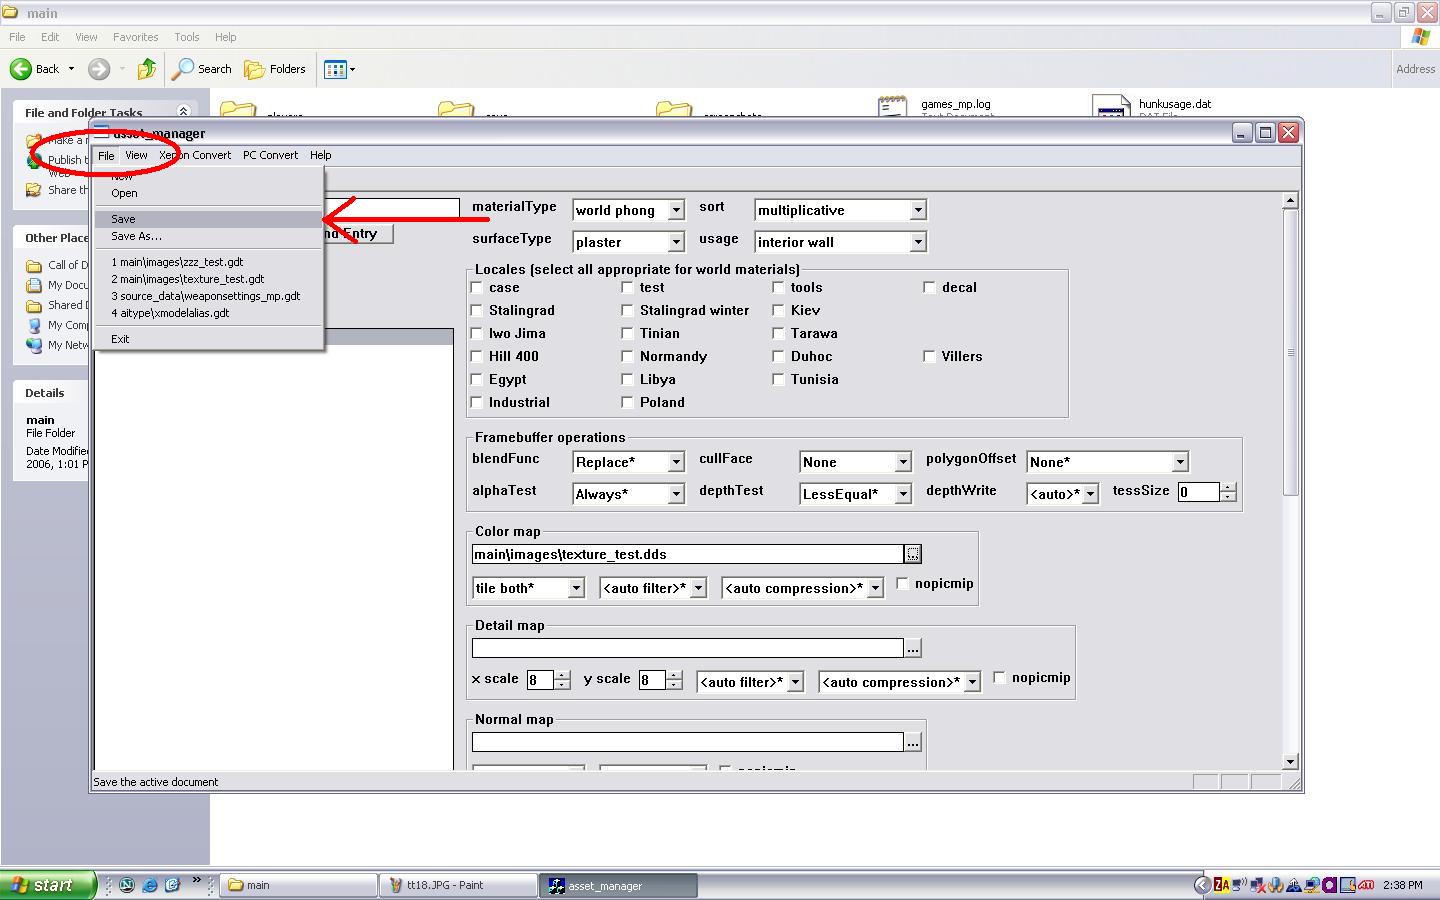
Be sure to name your game data file the same as what you started your asset manager under. In this case stryder_textures. It is good to note that you can open, edit, delete, and add entries to your game data file, so only one .gdt is required per project.

Now, after all that work we can actually create our texture. Click PC Convert --> Current Assets Only
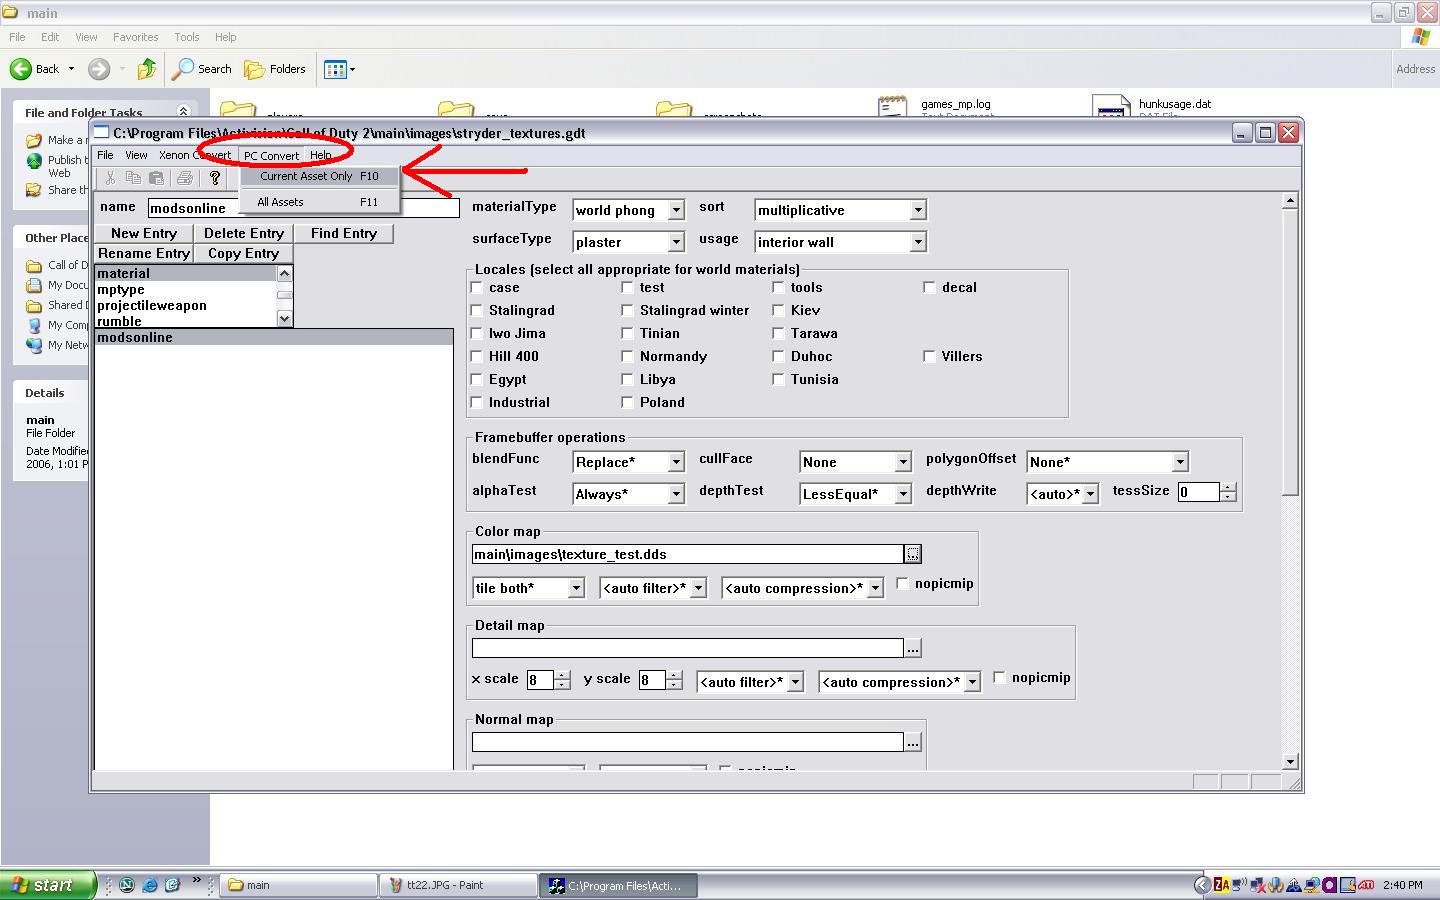
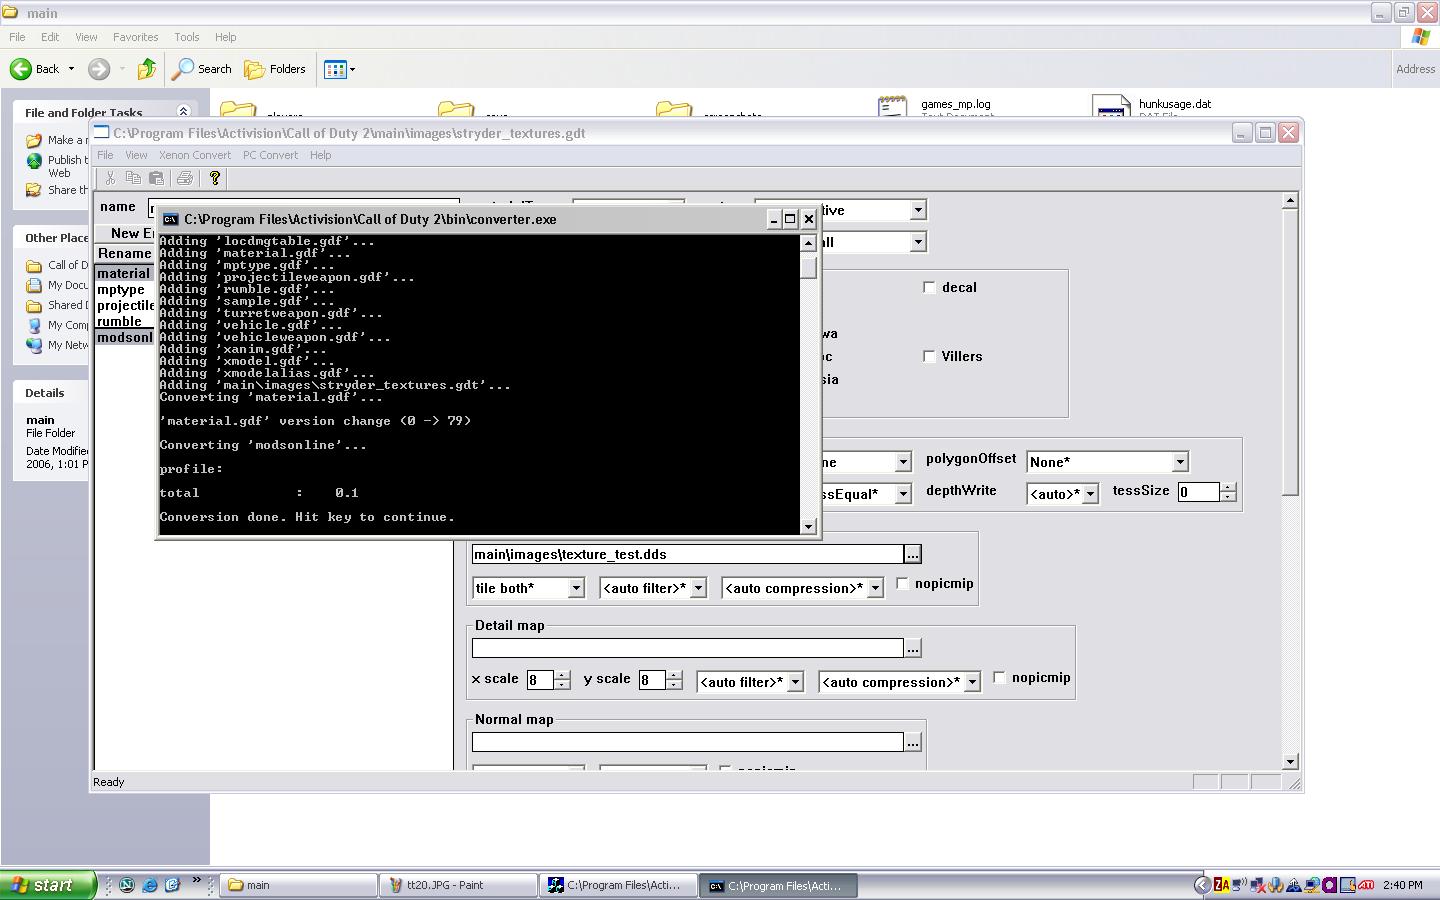
A command prompt window opens and your asset is converted into a usable image, for both the editor and the game.
You should notice that in your /main/ directory you have a folder called /materials/ and in there your texture name. Also, in your /images/ directory there should be a brand new .iwi file.
Be sure to include these files in any .iwd file you create and distribute.
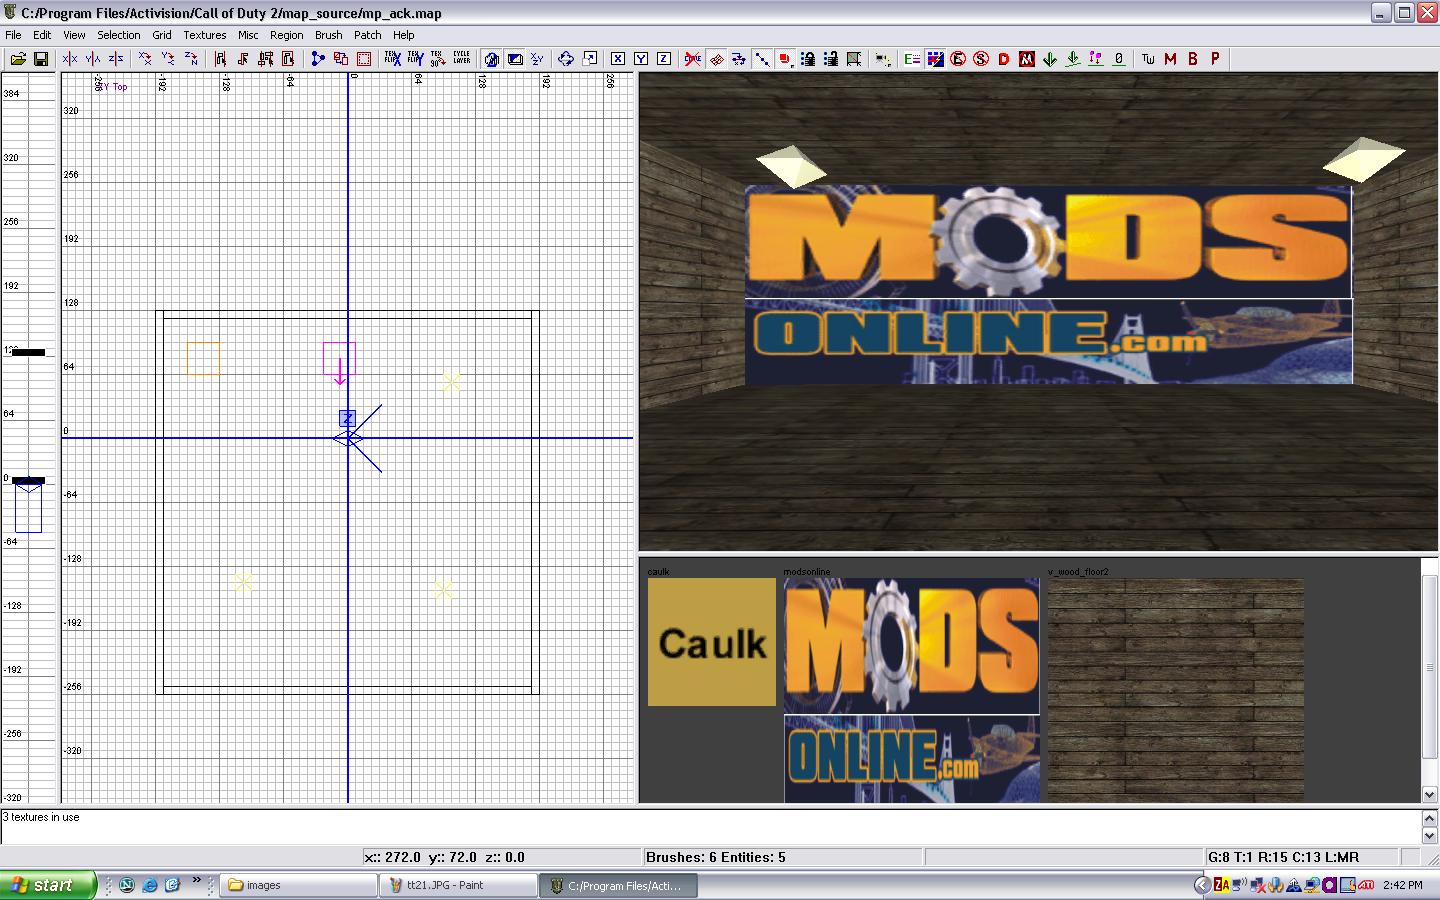
Picture of texture in the editor
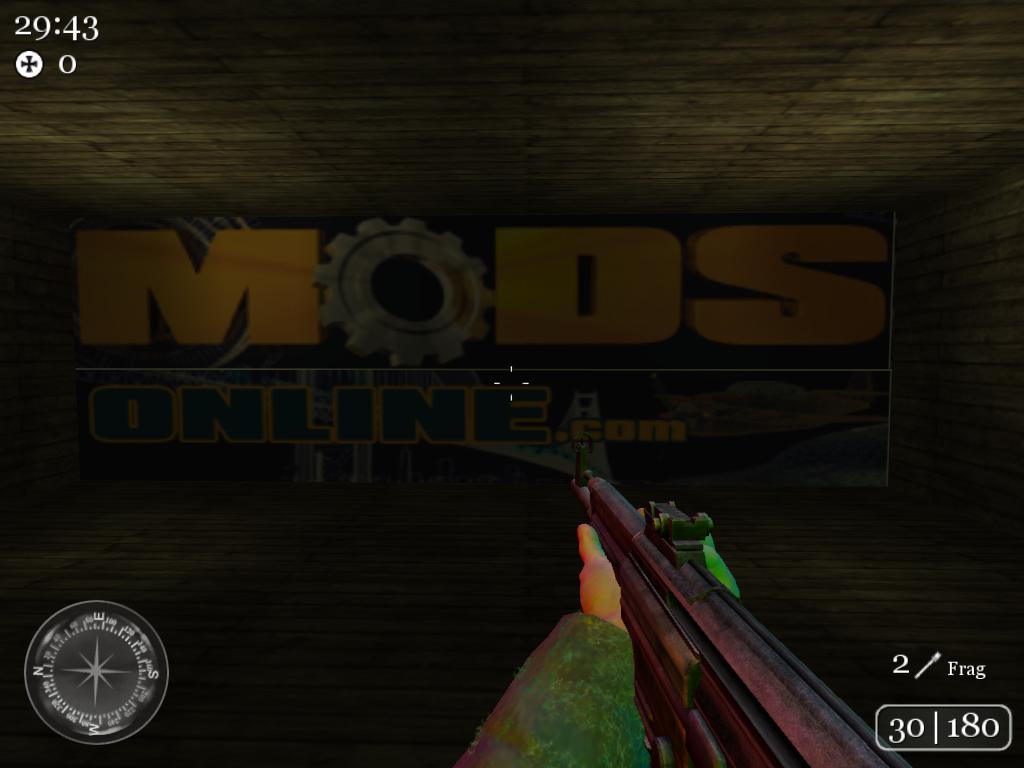
Picture of the texture in the game
That's it
StrYdeR
*Edit Number Two*
|OCG|=gLiTcH= figured out this fix:
This is a tut to get a custom texture check box in the asset manager, as well as make an appropriate custom texture locale in radiant. You can set up a Usage Specification as well, but I personally let the asset manager handle what type of texture it is. As a precaution, back up any files I may have you open and edit. Open the two files below with notepad....
Files location and ones needed are: ( DL represents your HD, mine is on C:)
DL:\Program Files\Activision\Call of Duty 2\deffiles\material.gdf
DL:\Program Files\Activision\Call of Duty 2\deffiles\materials\locale.txt
For material.gdf, scroll down until you something like this:
int 0 0 1 locale_case
int 0 0 1 locale_test
int 0 0 1 locale_tools
int 0 0 1 locale_decal

int 0 0 1 locale_Stalingrad
int 0 0 1 locale_Stalingrad_winter
int 0 0 1 locale_Kiev

int 0 0 1 locale_Iwo_Jima
int 0 0 1 locale_Tinian
int 0 0 1 locale_Tarawa

int 0 0 1 locale_Hill_400
int 0 0 1 locale_Normandy
int 0 0 1 locale_Duhoc
int 0 0 1 locale_Villers

int 0 0 1 locale_Egypt
int 0 0 1 locale_Libya
int 0 0 1 locale_Tunisia

int 0 0 1 locale_Industrial
int 0 0 1 locale_Poland

int 0 0 1 locale_glitch_custom
Add a line just like above, spaced under poland, with a name to your preference. Underscores, spacing and spelling are important, so keep an eye out if you receive any errors in the end.
Now lets scroll down, about 1/4's down in this same file and look for something like this:
hcontainer
{
checkbox( locale_Industrial )
[
exec
{
righttext()
height( 15 )
label( "Industrial" )
}
]
checkbox( locale_Poland )
[
exec
{
righttext()
height( 15 )
label( "Poland" )
}
]
checkbox( locale_glitch_custom )
[
exec
{
righttext()
height( 15 )
label( "glitch_custom" )
}
]
Copy polands properties from "checkbox" to it's last "]". Paste it below polands properties. Add your checkbox & label command as I did with the exact name you used in the other edit we just did. Double check everything and save it.
Now lets open up the locale.txt file.
You'll see something like this:
case
test
tools
decal

<separator>

Stalingrad
Stalingrad winter
Kiev

<separator>

Iwo Jima
Tinian
Tarawa

<separator>

Hill 400
Normandy
Duhoc
Villers

<separator>

Egypt
Libya
Tunisia

<separator>

Industrial
Poland

<separator>
glitch_custom
Add, just as I did, spaced under poland, your custom texture folder, same name as earlier. That's it, save and fire up asset manager and you'll see the checkbox. Do your custom texture work, and upon starting radiant, you'll see your own folder. Hope this helps out and isn't too confusing to follow. Enjoy!
|OCG|=gLiTcH=